It’s important to put foundations in place to receive analytics and data for your website. Even if you’re not seeing traffic right now, setting up Google Analytics and Google Search Console will show you when your site starts receiving traffic and seeing traction. Although not needed for a while, you’re going to be happy you set them up early when that time comes.
Note: If it’s easier for you to follow along in video format, watch the videos in Section 4 of the First-Time Internet Marketing Profits™ video training.
How To Set Up Google Analytics For Your Website
Google Analytics is a free service offered by Google that tracks website traffic and gives insight into how users find, use, and interact with websites.
First, navigate to the Google Analytics homepage. If you don’t already have a Google or Gmail account that you want to associate with your website, you’ll need to create one. To do so, select “More options” and then click “Create account.”
Tip: It’s wise to create a separate Google account to use only for the purposes of your website. Having separate personal and business Google accounts will save time and grief in the long run.
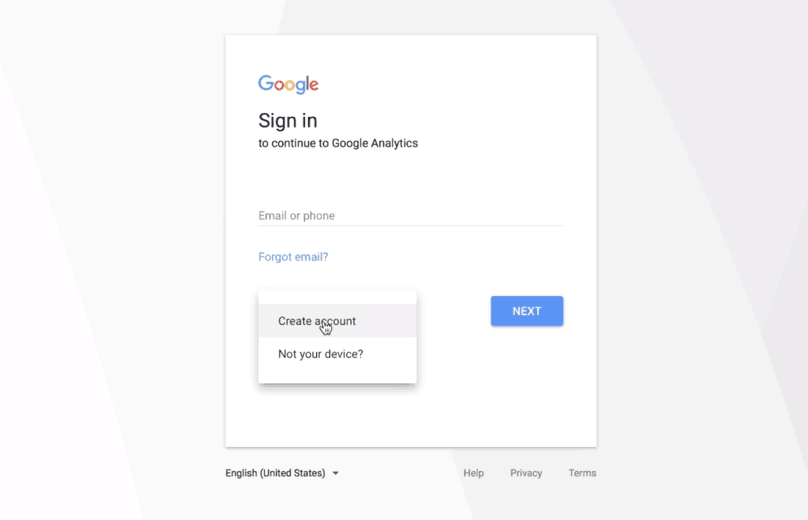
Google Analytics homepage displaying the Google sign in form with “More options” already clicked and displaying the “Create account” option
When you’re done creating a Google account, go back to the Google Analytics homepage and click “Sign up.”

Google Analytics homepage displaying “Sign up” button on the right
Clicking the “Sign up” button will navigate you to a form asking for information about your website.
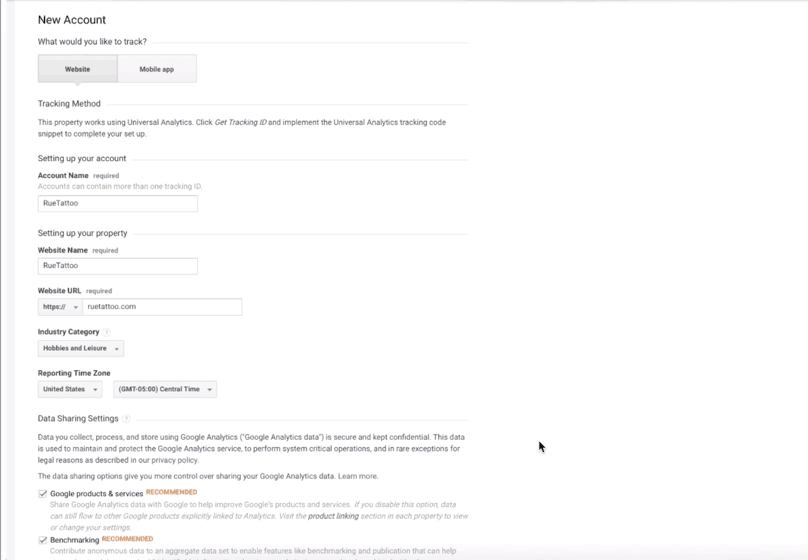
Google Analytics “sign up” page with fields filled out
Once you’ve filled out all the fields, click “Get Tracking ID.” You’ll be prompted to accept the website terms in order to receive a Tracking ID and Tracking Code.
Google Analytics homepage with Tracking ID displayed and Website Tracking code selected
Your Tracking ID identifies your Google Analytics account. This is included in your tracking code, a code that needs to be added to your website to allow Google Analytics to gather data.
First, you’ll need to install a plugin for headers and footers. Go back to your WordPress Dashboard, click “Plugins” then “Add New.” Then, search for “header and footer” and install the plugin titled “Insert Headers and Footers.”

WordPress Dashboard, Plugins, Add New, search “header and footer,” install “Insert Headers and Footers” plugin
Once you’ve activated the Insert Headers and Footers plugin, you can access it by clicking “Settings” on the left-hand side of the page, then clicking “Insert Headers and Footers.” Now copy the tracking code from Google Analytics and paste it under “Scripts in Header” in WordPress and click “Save.”
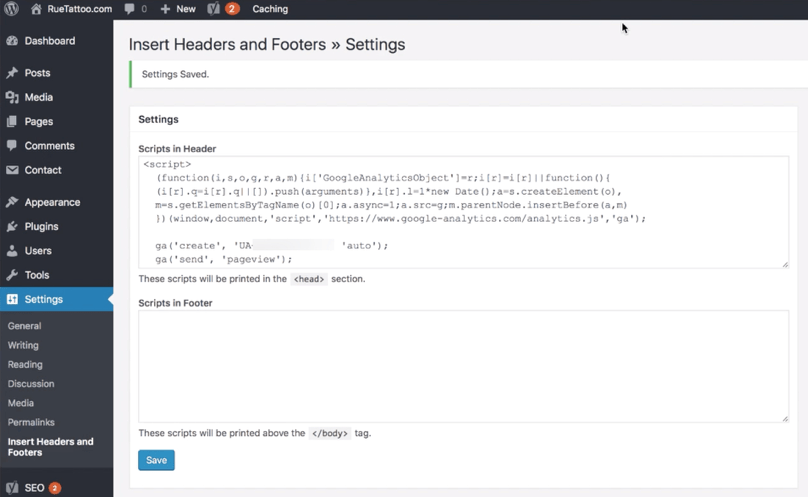
WordPress Dashboard, Settings, Insert Headers and Footers, “Settings” page, “Scripts in Header” text box containing tracking code
After successfully saving the tracking code in the header script, Google Analytics will track all the pages on your website, compile and analyze the data in your Google Analytics account, and allow you to access the information when logged in to Google Analytics. Note that it may take a couple of hours for Google Analytics to receive data. If it’s been days and you’re sure you’ve been receiving traffic, yet Google Analytics isn’t reflecting that, contact Google Analytics customer support.
How To Set Up Google Search Console
Google Search Console is another free Google service that monitors a website’s presence in Google Search results. It’s not strictly required to sign up for this service, however, it can really help optimize your website’s performance in search results by providing information on how Google views your website.
First, go to the Google Search Console homepage and log in using your Google username and password. Logging in will take you to a welcome page where you can add your website.
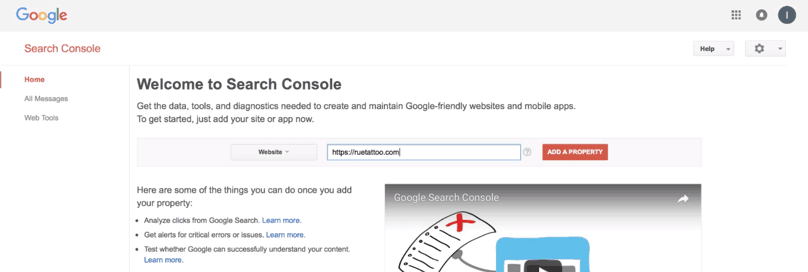
Google Search Console “Welcome” page with website input
An important thing to remember here is that when entering your website, enter it EXACTLY as it is shown in your WordPress settings. To verify the exact address of your website, go to your WordPress Dashboard, click on “Settings” on the left-hand side of the page, then find the “Site Address (URL)” field. The URL in that field needs to exactly match the one you submit to Google Search Console. Otherwise it won’t work.
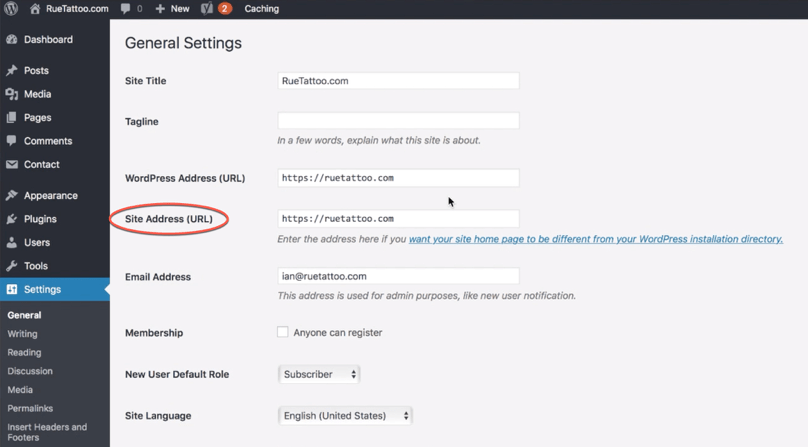
WordPress Dashboard, Settings, “General Settings” page. Note the “Site Address (URL)” field.
After double-checking your site address (URL) in WordPress, go back to Google Search Console and enter your website URL. Then, click “Add A Property.”
Things are going to get a little tricky here, so please bear with me.
Clicking “Add A Property” will navigate to a page where you’re asked to verify the ownership of your website. Click on “Alternate Methods” and then “HTML tag.”
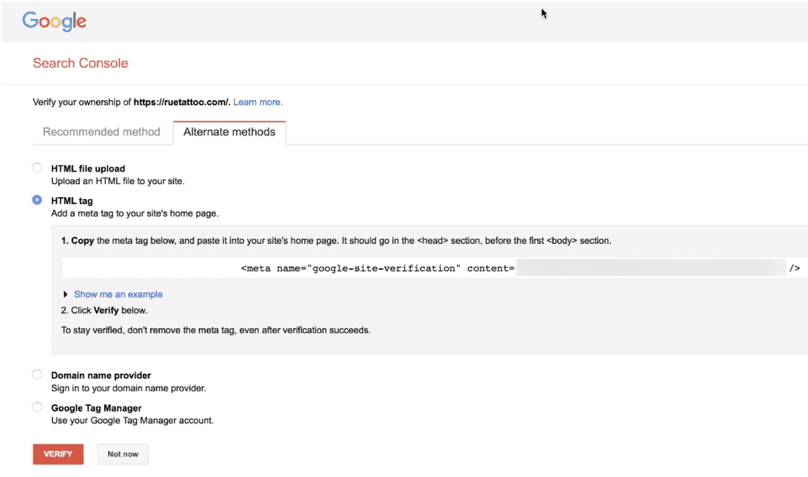
Google Search Console, Verify Ownership, “Alternate methods” tab selected, “HTML tag” selected
Copy the Meta Tag generated and go back to your WordPress Dashboard. Click “SEO” on the left-hand side of the page to go to the Yoast SEO settings. Click the “Webmaster tools” tab, look for the field that says “Google Search Console,” paste the Meta Tag copied from Google Search Console, and click “Save changes.”
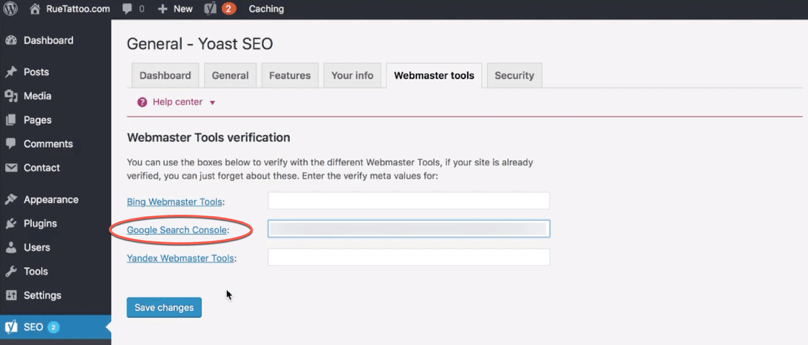
WordPress Dashboard, Yoast SEO Dashboard, “Webmaster tools” tab. Note the “Google Search Console” text field.
Once changes have been saved in Yoast, go back to Google Search Console and click “Verify.” If the steps were completed correctly, Google Search Console will display a confirmation message that looks like this:
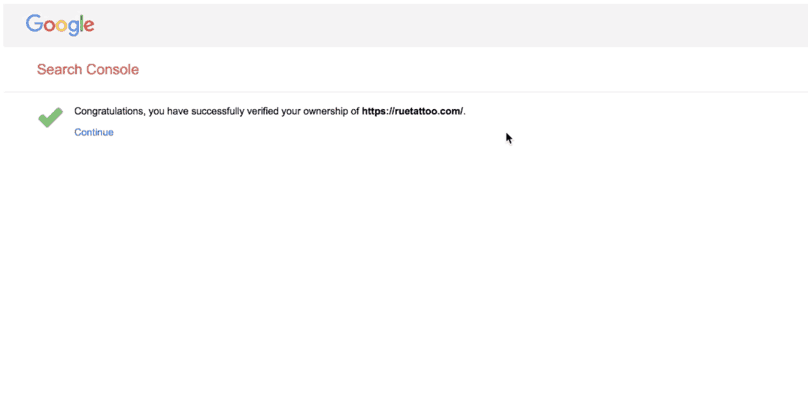
Google Search Console, Confirmation message that ownership has been verified
Now it’s official: you’ve completely set up your website!
Your newly-created website is now ready to be filled with quality content. In the next six lessons I’m going to outline everything you need to know about keyword research.
Lessons 13–24 Key Takeaways
- There’s absolutely no way you can build a stable and profitable internet business without your own website.
- Establish an independent mindset now. You need to have a self-seeking, independent mentality to be able to successfully create your website and online business.
- You don’t need an exact match domain; in fact, it might even harm your website.
- Your domain name should meet the following criteria (in order of priority):
- Have a “.com” domain suffix
- Be memorable, brandable, and easy to spell
- Be as short as possible (3 words maximum)
- No hyphens or numbers
- Include a root keyword
- If you’ve done everything to go with .com but can’t find an acceptable domain name, consider only “.net” or “.org.”
- There is no 100% perfect domain name. You’ll have to make some compromises but having these guidelines in mind will help you select a domain name that’s close to it.
- Some useful tools to get ideas for domain names include Lean Domain Search, NameMesh.com, and NameBoy.
- There are three major options to register your domain name: through the hosting company, GoDaddy.com, or Namecheap.com.
- Namecheap offers the best value for money in the long term and is therefore my top recommendation for registering your domain name.
- Start with shared hosting first and aim to eventually outgrow that into dedicated servers.
- Bluehost offers the best service and support over any other low-cost shared hosting company I’ve worked with and is therefore my top recommendation for hosting.
- Sign up for unlimited domains up front because you’re likely to need that down the road.
- If you registered your domain separately from your hosting provider, you’ll need to update your nameservers on your domain registrar. For instructions, consult the websites of your domain registrar and hosting provider.
- WordPress is the best CMS to use because of its customization, wide customer and knowledge base, and superior plugin collection.
- Once you’ve set up WordPress, delete the default post and pages to avoid confusion.
- If you set up WordPress through Bluehost, you can delete the following plugins: Akismet, Hello Dolly, Jetpack, MOJO Marketplace, Optin Monster, WPForms Lite.
- Install the following recommended plugins instead: Yoast SEO for SEO, Easy Updates Manager for handling updates for WordPress, plugins, and themes, Wordfence for security, and Contact Form 7 for contact forms.
- Adjusting your site’s permalink structure to the post name is essential for SEO.
- Changing your display name from your username to your nickname is crucial for security purposes.
- When selecting plugins, select those that are highly ranked and regularly updated.
- When starting out, the only things that matter in terms of website design are that your website is clean, easy to navigate, and mobile responsive.
- Your website’s core content includes your About Page, Contact Page, a Privacy Policy page, and a Terms and Conditions page.
- Set up your navigation menu early on so that visitors can easily navigate through the pages of your site.
- If you plan to include links to other sites in your navigation menu, it’s best to have them open in new tabs so your visitors don’t navigate away from your website unnecessarily.
- It’s really important to set up Google Analytics and Google Search Console as early as possible so that you can get really good analytics and data on your website.
- Google Analytics and Google Search Console are both free services; the only requirement is a Google account.