The next step to building your website is installing a CMS. Since I’ve established that WordPress is the best CMS, that’s what I’m going to recommend you install for your Bluehost-hosted websites. In this lesson, I present a Bluehost WordPress tutorial covering three scenarios.
Three Scenarios to Cover
Scenario 1 means you bought your domain at Bluehost.
Scenario 2 means you bought your domain with another registrar (i.e., Namecheap, GoDaddy, etc.) AND signed up for Bluehost using this domain.
Scenario 3 means you bought your domain with another registrar AND signed up for Bluehost, but you didn’t use that domain to sign up with Bluehost.
Scenario 1: Bought Domain at Bluehost
By default, WordPress is installed once Bluehost gets your account set up, so you don’t need to do anything else.
Scenario 2: Bought Domain with Another Registrar AND Signed Up for Bluehost with That Domain
Note: If you’d prefer to follow along in video format, watch the videos in Section 4 of the First-Time Internet Marketing Profits™ video training.
In this scenario, you bought your domain with another registrar (in our example, it’s Namecheap) and then used that to sign up for Bluehost. This is what it looks like:
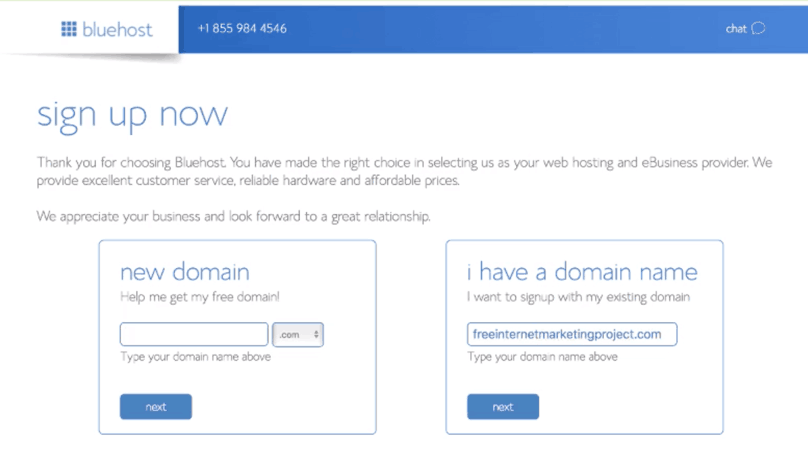
Bluehost Sign Up page with option “I have a domain name” filled out and selected
If you input your domain name in the “I have a domain name” section and clicked “Next,” AND if you followed the steps in Lesson 17 correctly (i.e., updated your Nameservers with your Domain Registrar), then WordPress has already been installed. You don’t need to do anything else.
You can check that your nameservers have been updated by logging in to your Bluehost account. Then, go to “My Sites” on the left-hand side of the page. Hover the mouse over your domain and click on “Manage Site.” Here’s what it looks like:
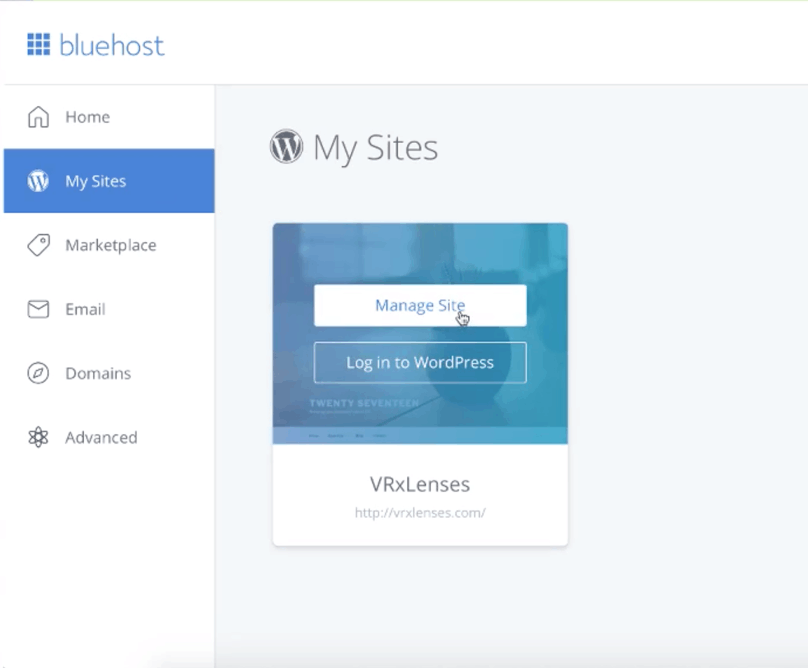
Bluehost My Sites with “Manage Site” highlighted
You’ll be routed to the “Manage Site” page. Click on “Settings” in the navigation menu and check that the URL under “Site URL” is your actual domain.
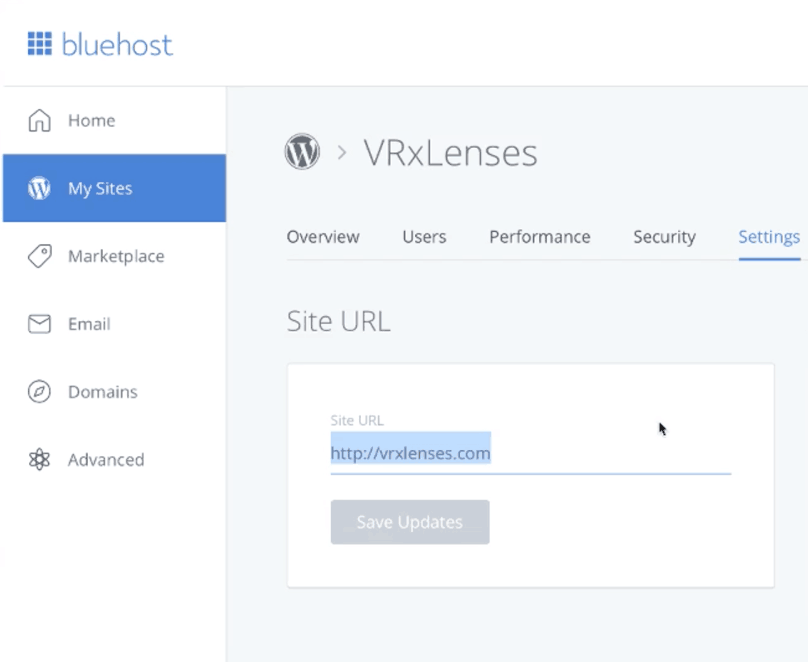
Bluehost Manage Site with “Settings” selected and “Site URL” highlighted
Scenario 3: Bought Domain with Another Registrar AND Signed Up for Bluehost But Didn’t Use That Domain to Sign Up with Bluehost
As you can probably guess, this is the most complicated scenario to deal with. This applies if you bought your domain through another registrar, but you did NOT sign up during the Bluehost process. Either you forgot to use the domain when you were setting up Bluehost, you didn’t have a domain yet when you set up Bluehost, or you plan to buy another domain down the road and you want to create that website on the same Bluehost hosting account.
Note: This process can become quite complicated. If it’s easier for you to follow along in video format, watch the videos in Section 4 of the First-Time Internet Marketing Profits™ video training.
Here’s an overview of the steps that need to be completed:
1) Update nameservers (refer to Lesson 17) with domain registrar.
2) Create an Addon Domain in the Bluehost cPanel.
3) Install WordPress for new domain.
4) Double-check website to ensure correct URL set up.
Before anything else, you need to update your nameservers with your domain registrar. The following process will not work if your nameservers aren’t updated.
Once that’s sorted out, you need to log in to your Bluehost account. Then, click on the “Domains” tab on the left-hand side of the page to display a new page. Then, you need to click on “Assign a domain to your cPanel account.” Here’s what it looks like:
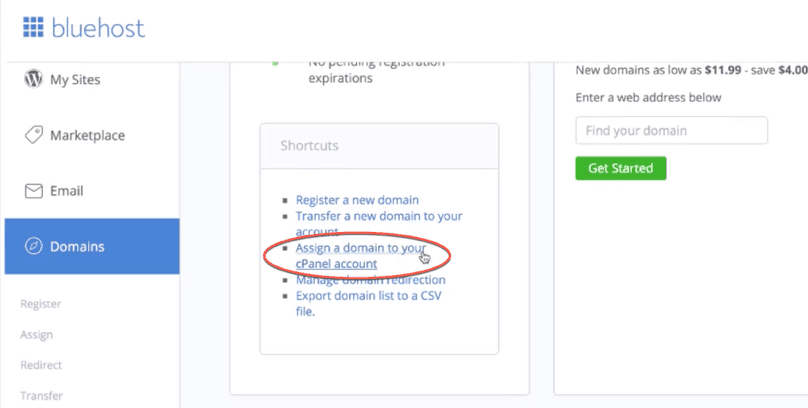
Bluehost Domains with “Assign a domain to your cPanel account” clicked
That will take you to another screen. Select “Use a domain that is not already associated with your account” and input your domain in the “Domain” field.
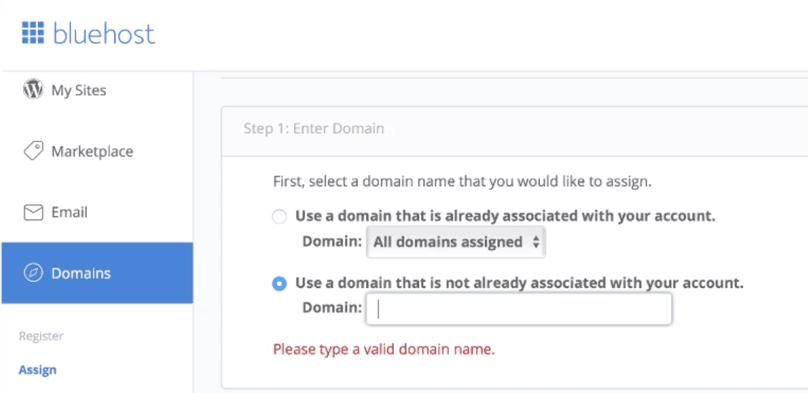
Bluehost, assign a domain to your cPanel account, Step 1: Enter Domain. Select “Use a domain that is not already associated with your account.”
Once you’ve input your domain and it’s been verified, a confirmation message that your domain has been verified will be displayed.
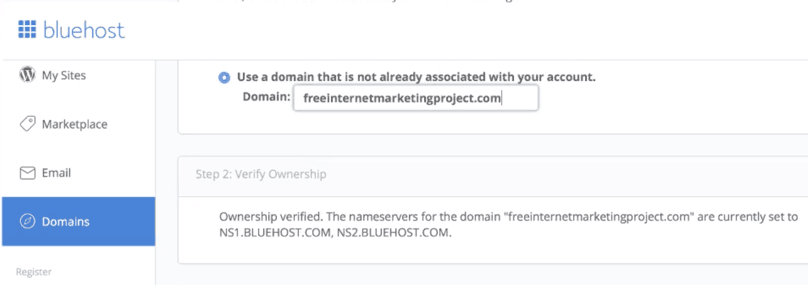
Bluehost, assign a domain to your cPanel account, Step 2: Verify Ownership. Note the confirmation message that domain has been verified.
The next step is to make sure the “Addon Domain” option is selected.
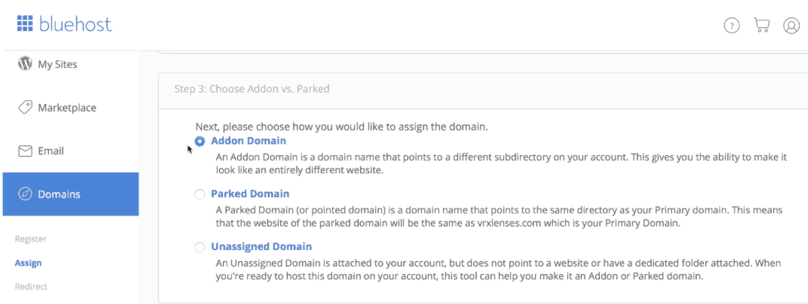
Bluehost, assign a domain to your cPanel account, Step 3: Choose Addon vs. Parked. Select “Addon Domain.”
Next, make sure that the “Create a new directory” button is selected.
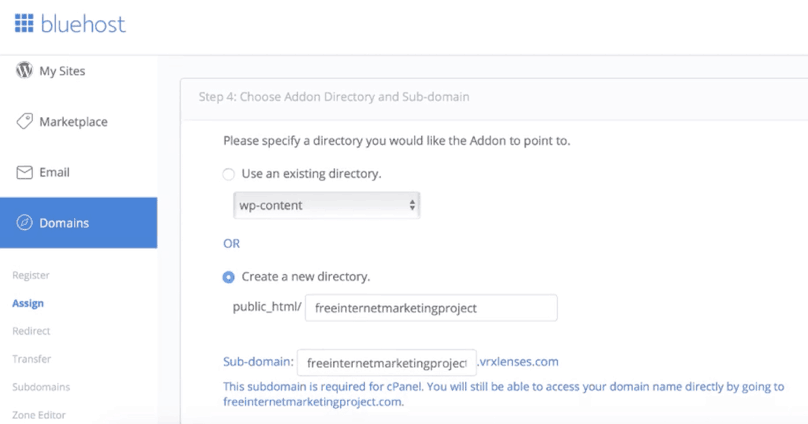
Bluehost, assign a domain to your cPanel account, Step 4: Choose Addon Directory and Sub-domain. Select “Create a new directory.”
When all of these steps are complete, you can then click “Assign this Domain” near the bottom of the page.
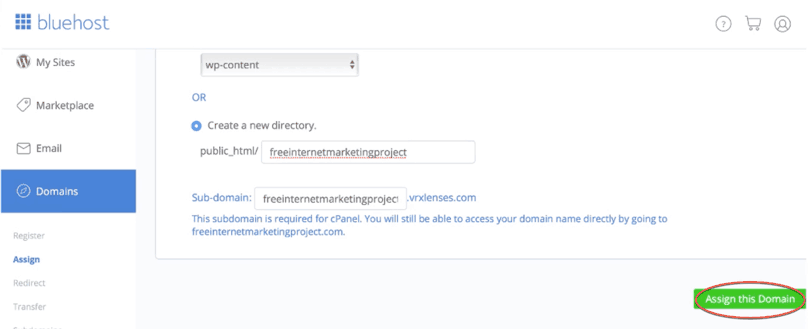
Bluehost, assign a domain to your cPanel account, “Assign this Domain” button
Once processed and done, your site should be listed in the “Domains” page as an Addon Domain.
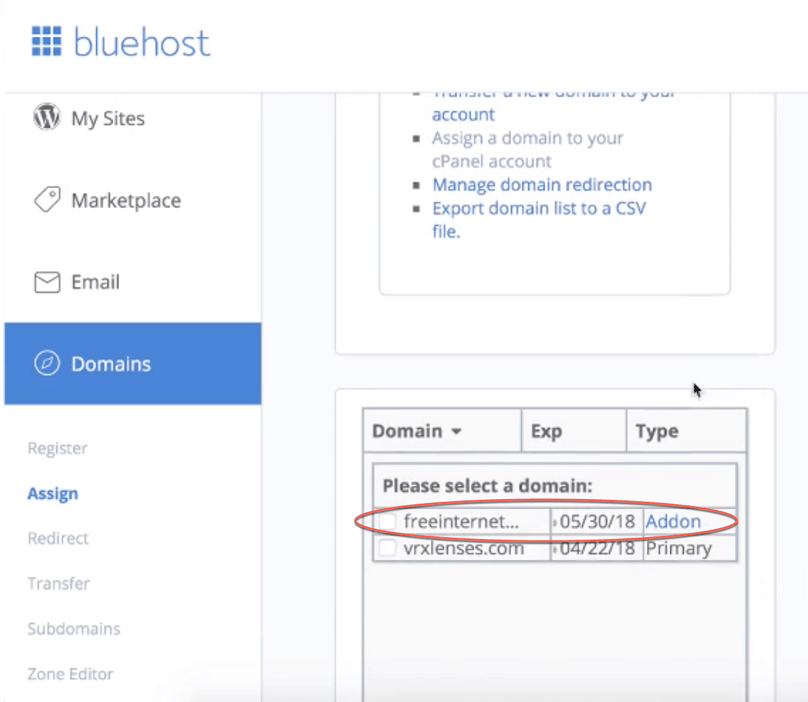
Bluehost’s Domains page. Note that the created addon domain from the previous step is displayed.
Now that we’ve created an Addon domain, we can now install WordPress to that domain.
To do that, you’ll need to click on “My Sites” on the left-hand side of the page, then the blue “Create Site” button in the upper right corner of the page.
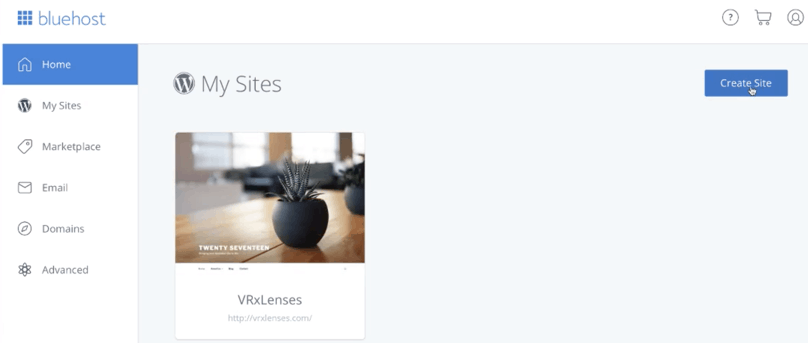
Bluehost’s “My Sites” page with “Create Site” button.
Clicking “Create Site” will route you to the “Create a new WordPress site” page where you’ll be asked to input your Site Name and Site Tagline. Don’t stress about this too much at this point because you can easily change that in the future.
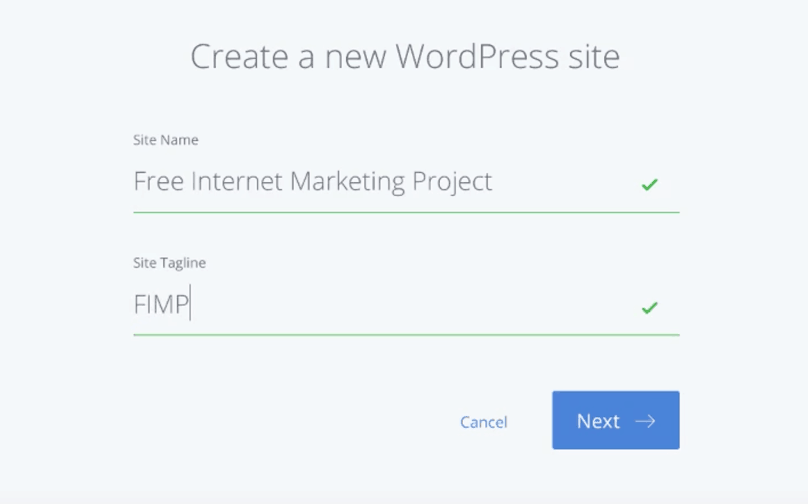
Bluehost’s “Create a new WordPress Site” page. Take note of the required information (Site Name and Site Tagline).
Once you’ve input a Site Name and Sit Tagline, click on “Next” to be taken to the “Choose a Domain” page. Make sure you select the correct domain under the “Domain” dropdown menu. If you select the wrong domain, you’ll overwrite the existing WordPress installation on that domain. Leave the space under Directory blank and uncheck the boxes for “WP Forms” and “Opt-in Monster.”
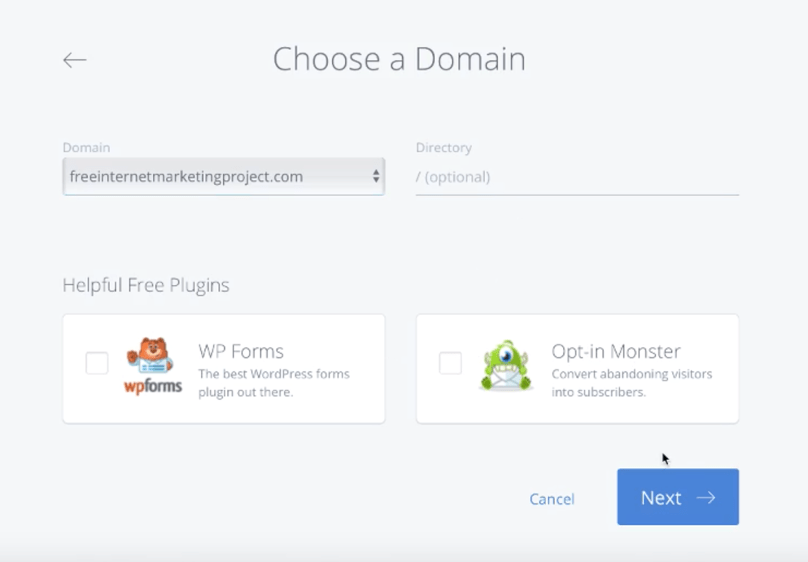
Bluehost’s “Choose a Domain” page. Make sure to select the correct domain under the “Domain” dropdown menu and not to enter anything under “Directory.”
It will take a few seconds to a few minutes for WordPress to set up. Once complete, a confirmation page will be displayed with important login details, such as the WordPress Admin page and your username and password. This information will also be sent to the registered email address.
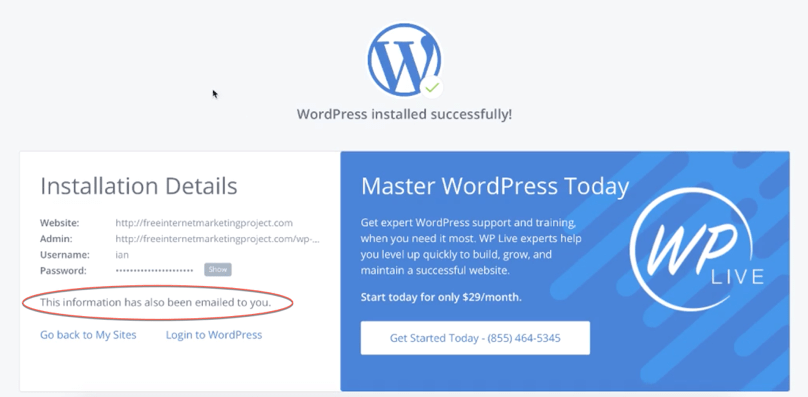
Bluehost’s WordPress installation confirmation page
WordPress should now be installed on your domain. You can check it by logging into your WordPress account or simply going to the domain through your browser.
If you encounter any technical issues during set up, contact Bluehost. If you’re not in the U.S., you can relay difficulties to Bluehost via their Support Team Twitter account.