Menu

If you’re determined to make money from your blog, building an email list is crucial to your success. Today’s article will guide you through the basics of how to build an email list for marketing. Learn how to attract leads via a lead magnet, how to create opt-in forms for your blog, what to look for in an email marketing service, and how to write your emails.
If you’re serious about making money from your blog, building an email list is one of the most fundamental things you need to do.
But first, what is an email list, and why should we even bother?
Quite simply, an email list is a database of names and individual email addresses that you have permission to send general communications, updates, and promotions to.
But why is building this database important?
Before we had messaging software, before social media, we had email. And it doesn’t look like it’s waning anytime soon.

People can stop checking their social media feeds, people can stop logging on to their messaging software, but they’ll rarely neglect their email inboxes.
No other way of communication allows a more personal and direct access to your audience. That your reader allowed you into their inbox means they want to hear from you and trust you and your content.
In addition, your audience knows on some level that directly replying to your email gives them a better chance of being heard than replying to a tweet, or commenting on a Facebook status update. That way, the intimacy isn’t just one-directional.
The opportunity to have one-on-one conversations, whether or not they take advantage of it, helps build trust and connection.
Furthermore, making them part of your blogging journey will foster a connection to your blog that you simply can’t build with social media. There’s something about being part of a community and watching it grow that gets them more committed to you and your blog.
Once you’ve built that trust and connection, you can survey your readers about their demographics (gender, age, location, occupation) and problems or struggles within your niche. That way, you’ll know if you’re reaching the people you were targeting to reach. More importantly, this will give you an idea of what content, as well as products and services, will benefit your audience the most.

In the same way, you can survey your readers about what they like and don’t like about your blog. You can ask them what they want to see more of, as well as what they want to see less of. They might have suggestions about what you can improve about your blog.
Every time you send an email with a link back to your blog, be it your most read blog post or your most recent, that’s an opportunity to drive traffic back to your blog. As you know, increased traffic to your blog also increases your chances of making money from your blog, be it from affiliate marketing or selling your digital products.
Google search can someday tank, and Facebook and Twitter can both go the way of MySpace. If, heaven forbid, that happens, and you don’t have an email list, all your SEO efforts and your social media campaigns to get more followers go down the drain.
But if you have your email list, that’s yours.
Your ability to reach out to your list is not controlled or dependent on another company’s whims. Your audience, your rules.
Once your email is in your subscribers’ inboxes, it’s there until your subscribers do something about it. They can either read it, delete it straight away, click or don’t click the links inside, or even unsubscribe. It’s entirely up to them.The more empowered your subscribers feel, the more trust they’ll have in you, and the more likely they are to read your emails.
Whichever monetization method you choose for your blog, your revenue will be more likely to come from your email subscribers. Various marketing studies have found that it’s easier to sell to your existing customers than it is to attract and sell to new ones.
These are all fantastic reasons to start building your email list today. So let’s get right to it!
You’re probably subscribed to some blogs and websites right now, and probably receive promotional emails as well as newsletters from various sources.
Wait. Newsletters are different from promotional emails?
Yes, they are.
It’s a common misconception probably because businesses tend to blur the lines between email newsletters and marketing emails, and now it’s become confusing. But let me clear this up for you before we go further because they are different and will help you achieve different things.

Email newsletters are emails that contain news, hence the name. They’re published on a regular schedule (usually weekly or monthly) and contains mostly high-value, relevant, informational articles from your blog as well as other blogs and websites in your niche. The idea here is to get you positioned as a source of high-quality, up-to-date information about your niche that your subscribers are likely very interested in.
It’s up to you to include calls to action or marketing messages, but I don’t recommend doing this. The goal of your newsletter emails is to provide helpful information and earn your subscribers’ trust and respect while keeping your blog and your brand in your subscribers’ minds.
Remember: The primary goal for email newsletters is engagement.
Marketing emails, by contrast, are emails that attempt to persuade your recipient to take some sort of action, which is usually to make a purchase. Although that’s the ultimate goal, you don’t have to sell them anything in the beginning. Further down this article, I’ll give you some tips on what to email when you’re just starting.
For now, your goal is to convince your leads that you have the knowledge and skills to provide a solution to a problem.
Remember: The primary goal for marketing emails is sales.
Note: Just to reduce confusion, I’m going to refer to those readers who opt in through your lead magnet as “leads” and those readers who subscribe to your updates as “subscribers.”
To be absolutely clear, what I’m going to discuss is how to build an email list for marketing purposes.
Now that I’ve explained it and it’s clear (hopefully), let’s go through the process.
When you give your readers an incentive, they’re much more likely to sign up to be part of your email list.
A lead magnet, also called an opt-in bribe, is something of value that aims to entice your target audience to provide their contact information in exchange for that bribe.
Given its purpose, you’ll need to ensure that this lead magnet is attractive to your target audience. So what makes someone want to get a lead magnet enough to provide you their email address? Some of the reasons are listed below.
When your reader sees an item that fulfills one or all of them, it’s likely to be attractive enough that their objections to give you their email address is overcome.
The usual bribe is an ebook, but depending on your audience, it doesn’t have to be a big, multichapter book right away. Here are some ideas for lead magnets you can use:
A checklist is a one-page summary of a piece of content. It’s an actionable list such that when you’re done with an item, just check it off and you’re done. Just about any “how-to” blog post can be adapted to a checklist.
A cheat sheet is a simple outline of valuable data and shortcuts. It could be a summary of the important points of an especially long-form piece of content.
Your most information-packed, valuable posts can be made into a downloadable PDF version. It doesn’t look like too much effort on your end, but for the right post and the right reader, this can be valuable enough for them to give you their email address.
A template is anything that can serve as a pattern so your readers don’t have to make something from scratch. Some examples of templates include Excel templates for productivity, email templates for job-hunting or marketing, and workout sheets for fitness blogs.
This is a collection of links that your reader can use as a reference. This can be a list of links to your blog posts that are related to a specific topic. For example, if you run a food blog, you can compile links to your blog posts about the best Mexican restaurants in your area.
A workbook or worksheet is a collection of exercises/questions your reader has to fill out and answer designed to improve knowledge or to serve as a guide in doing a task.
An infographic is a visual representation of data that can include charts, diagrams, or icons. It’s meant to be a simple, at-a-glance way of presenting information. If you can condense a content-heavy blog post into a beautiful infographic, that should be valuable enough for the right readers.
There’s a reason Buzzfeed quizzes are all over social media: people just can’t get enough of them. Take a page from them and create a test or self-assessment that your audience will want to take and ask them for their email in exchange for the result. Tests that usually work include “What type of ___ are you?” and “What ___ fits your personality?”
An email course explores an important topic over weeks or months. It’s bite-sized information that’s more manageable for your reader compared to an ebook. This kind of contradicts the part where I said your lead magnet should be available immediately, but this could still work if your niche has a specific problem and there just isn’t one simple solution. Plus, if you send the first email lesson right after they sign up, then that’s still going to satisfy the instant gratification requirement.
A short instructional video can work if text or infographics aren’t enough. It can be a demo video of a process, or a walkthrough of a process.
If you’re already selling your own digital products, discount coupons can be a valuable lead magnet. For your readers, because discount, and for you, because if they’re interested in a discount coupon, that means they’re ready to buy or at least thinking about it.
It’s like a mini-membership area, but free. Essentially, your blog posts are available to the public, but you have some higher quality, higher value content that you’re only making available to your mailing list. If your readers already love your content, they’re going to want in on higher level content.
This is by no means an exhaustive list, but just some ideas to get you started. Get creative with them. You can also use your minimum valuable product if you’ve already started making your digital products.
The key here is to get your readers curious with relevant offers that they can immediately consume.
When you’ve created your lead magnet, you can now start building a landing page for it. I’ve talked briefly about how to make a sales page previously, but a landing page is different because it has a different purpose and leads to a different action. A sales page leads to a purchase while a landing page leads to a sign up to your mailing list.
Granted, your readers’ email address is less of a commitment than an actual purchase, but it doesn’t make your landing page any less important. Here are the essential elements of a landing page.
You want an eye-catching headline that sums up your offer as clearly as possible. If it’s an ebook, say it’s an ebook. If it’s a template, say it’s a template.
It can simply say:
Your Blog Post Checklist: Download for FREE!
Here, you can provide a little more information about the benefits and value of your lead magnet. Following the example above, your subheader can be:
This Blog Post Checklist can help you create awesome blog posts to help you increase your traffic and revenue from your blog!
As straightforward as your headline and subheader are, they may still not be enough for most of your readers. Bullet points are great here so you can be punchy without leaving anything out. Use boldface and italics to emphasize key phrases.
Briefly state what they can expect to receive (a one-page pdf? A printable Excel file?) and more importantly, what they’ll gain (knowledge? Skills? A reference?), and what your offer will help them do or achieve (help them become more productive? Easily create recipes? Make valuable information more accessible?)
You can even take the extra effort to make this part SEO-friendly by plugging in some keywords, but be careful not to sound mechanical here. It’s more important that your reader is convinced of the benefits of your lead magnet than it is for search engines to find your landing page because your goal here is conversion; that is, you want your casual reader to sign up to your mailing list.
Including a visual of what your reader is getting is always a great idea. It reinforces your promise of what exactly they’re going to get. You said they’re going to get a checklist? Here’s what it (more or less) looks like. If you do use an image, make sure it’s related to your offer. You don’t want a picture of an ebook there if you’re giving away a checklist.

The same goes for video, if you decide it’s better than an image. Make sure it explains your lead magnet precisely. And turn off the autoplay feature; if they want to watch the video, they’ll play it. Don’t assume; they may be at work, or their internet speed may be slow. There are many reasons for not wanting to play your video, so don’t automatically assume they want to watch it.
This is where your readers enter their information so they can get your lead magnet and sign up for your mailing list. Basic information to ask here are their first name and email address, so you can at least address them personally when you send your communications.
Higher level lead magnets can justify asking for more information, but as a general rule, more fields result in fewer sign-ups.
Your readers’ information is precious; they tend to guard it from spammers. Display a link to your privacy policy so you can assuage their doubts about giving you their email address. Have it open on a separate tab so they can easily go back to your landing page after they look at your privacy policy.
This can work even better if you have a privacy message indicating you won’t spam them and you won’t share or sell any of their information (e.g., “We hate SPAM and promise to keep your email address safe.”).
Readers who don’t click your CTA don’t get your lead magnet AND don’t get on your mailing list.
The purpose of creating your lead magnet and your landing page is to get your readers to click this button and become leads.
I’ve previously discussed tips for creating effective CTAs, but here are some additional tips for the copy you can use in your CTAs in your landing page.
Generic CTAs aren’t going to cut it. Personalizing the copy, i.e., using the first person instead of the second person, will be more convincing. For our blog post checklist example, “Give me my free checklist!” can be effective.
While “submitting” their information is exactly what your readers are doing when they click on this button, as a general rule, don’t focus on the fact that they have to give you something. Focusing more on what they’re going to get after they click the button will be a better experience for your reader.
You can also reinforce the headline by using the word you used there in your CTA as well. Following from our example headline, you can use something like “Download my free checklist!”. This focuses on what the readers get, as opposed to what they have to do to get it.
Another approach you can take is take the main benefit of your lead magnet and use that as your CTA. Still following our example, you can use “I want to start writing great blog posts today!”
Designing a landing page is a bit different from designing a blog. What you want is to direct your readers’ eyes toward completing a single action; in this case, it’s your lead capture form and CTA. Here are some design principles to apply to your landing page.
The fewer actions they can take beside signing up and closing the page, the better. Increase the chances that your readers will stay on the page.
Test how your landing page looks in various devices.
I know I just said to ensure your landing page is responsive. But you want your readers who are using computers to see all the essentials, especially your CTA, the moment they look at your page.
The phrase “above the fold” actually came from describing the content on a newspaper’s front page. Anything that’s above the fold is visible to the reader even when the paper is folded horizontally. Thus, the headlines and the lead stories are all placed above the fold.
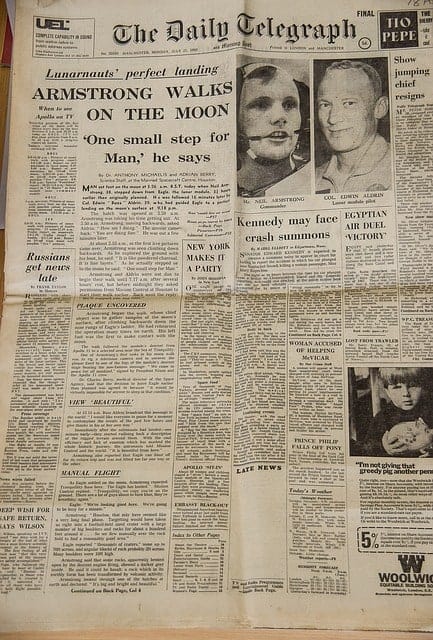
Newspaper on the day of the moon landing. Notice how the headline and lead story is above the fold, while the secondary stories and are below the fold.
Follow this principle when designing your landing page. Your reader shouldn’t have to scroll down to see your lead capture form.
Your lead capture form and CTA button are the most important parts of your landing page. Draw attention to them by framing them. You can do this by placing them inside a box separate from the other elements in a page.
Whitespace is also an excellent way to draw attention to your lead capture form and CTA. Directional cues, such as arrows and pointing fingers, are more obvious and “sales-y,” but effective when designed correctly.
It’s not the actual color of the button that matters, but how distinct it is from the background and all the other colors you’re using on the page (for more about colors, read this).
A button needs to look like a button to be clicked; that’s just the way our subconscious mind works, even though we are fully aware we are looking at a computer screen and nothing is actually three-dimensional. Rounded edges, gradient colors, and clever use of shadows can help achieve a clickable look for your CTA.
Don’t let your button cover the whole page, but make sure it’s noticeably larger than the other elements in the background.
You got your reader to click on your CTA button and convert from a reader into a lead.
Now what?
Now, you start nurturing your lead. Your Thank You page, the page they see after they click your CTA button, is an opportunity for you to provide value to your new leads and make them feel they made the right decision. Here are the essential elements of your Thank You page so you can start doing just that.
Always, always confirm that their action was completed. After all that hard work convincing your leads to sign up, you don’t want them scratching their heads and wondering if they were able to sign up or not. You can display something as simple as “Congratulations, you’ve successfully signed up!” or “Thanks for signing up!”
If your lead magnet doesn’t get sent to their email or downloaded to their device upon clicking the CTA in your previous screen, this is where you deliver on the promise on your landing page. This where they click on the download link for that cheat sheet or template, or watch the short video training you promised, or see the results of the test you made them take.

Or if you prefer to send them the link to download or the link to that video, tell them so. A simple “Your [lead magnet] is on its way! Check your email to access the link.” would usually suffice.
It’s not a Thank You page without a thank you message, am I right?
The thing is, saying “Thanks for signing up to my mailing list!” isn’t quite enough.
Express your gratitude for the action that they took and that you can’t wait to connect with them. They haven’t bought from you (yet) but start treating them as actual customers from the start.
Bring the links back!
On your landing page, you wanted no distractions and nowhere else for them to click. But now, you want to keep them from closing the page. You want them to explore your blog and see what else you have to offer.
On that note, you’ll want to post links to your blog posts that are related to the lead magnet they just got from you.
Note the word related. Following our example above (blog post checklist), you probably won’t want to include your blog post about how to design a Facebook header image. You’ll probably want to include your post on how to write effective titles and your post on how to choose the right images for your blog posts.
Ask them to share your lead magnet on their social media. Or, suggest for them to share your offer through email to someone they think would be interested in what you’re offering.
Side note: Those people that your leads forward your offer to? Don’t assume they want to be part of your mailing list, too. Don’t capture the emails that your leads type on here. That’s gross. Wait for these “recruits” by your existing leads to click on the link to your landing page on their email and give you their details freely.
Include links for your leads to follow you on social media as well. They don’t have to take up much space; you can plug them down on the footer so they’re not very imposing. Not that social media follows aren’t important, but you already have their email. That’s more valuable than them following you on social media.
If you’ve already set up an email newsletter, you can ask them to subscribe here. Or, if you already have another lead magnet that complements your initial offer, take this opportunity to offer it to them as well.
Better yet, if you’re already selling a product that’s related to the lead magnet, offer it to them! Make sure, though, that you’re linking to the sales page, not straight to the checkout. You don’t want to make them feel like you’ve elaborately set this up so they’re forced to buy. This is a surefire way for you to lose the trust you just earned.
Here are some more reminders when building a landing page.
Use any web analytics program (Google Analytics is free and offers a lot of support and tutorials) to track your landing page.
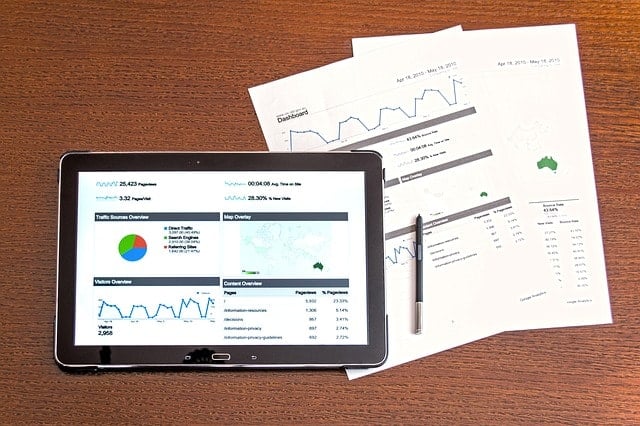
Often, it’s as easy as pasting some code on the landing page header. This enables you to find out how visitors to the landing page get here, how long they stay, and what percentage of them go through with signing up.
If you know how to track, then you can test. Tweak elements in your landing page and find which version is most effective in converting readers into leads. The best way to do this is by A/B testing,
Take some tips on how to promote your blog and apply them to your landing page if you can.
If you’re going to promote your landing page for signing up for your email list, you’re likely to use CTAs. Ensure that the headline on your landing page reinforces the messaging on the CTA that your reader clicked to get there.
Following our example, given your headline says “Your Blog Post Checklist: Download for FREE!” your CTA should be related to that headline. You can use “Download your free checklist here!” or “Get your blog post checklist free!”
When your audience clicks on a CTA and the landing page headline matches it, they are reassured that they’re going to get what was promised to them and are unlikely to click away or close the landing page.
Building a landing page for your lead magnet that you can promote is great, but you also want casual visitors and occasional readers to have easy options to sign up to your email list. Visitors will likely come to your blog posts, whether shared with them or as a search result. When they find your content helpful and valuable, and they want more of your content and what you offer, make it easy for them to sign up to your mailing list.
The first thing you need to do is create your opt-in forms, and then place them strategically throughout your blog.
As you will see when you start designing, your opt-in form will probably look like a stripped-down version of the landing page for your lead magnet.
Describe your lead magnet clearly and concisely. You can start by using the headline of your landing page, which also gives you points for consistency. However, other headlines can work better depending on how and where you display your opt-in page. You can experiment with your headline and test which ones work best for you.
Convey the main benefit and value of your offer. You can start by using the subheader of your landing page to be consistent as well, but again you can experiment with your description and test which ones convert the best.
Don’t use video here. Assume they only have time to quickly type their name and email and they’re going to be off to the next thing.
Do use a compelling image here. It’s advisable to show a picture of your lead magnet here, but you can also include a visual cue here to draw attention to your form and CTA.
At this point, don’t ask for more than their name and email address.
Assure them that you’re not going to spam them or sell or give away their information. Just place it in a small font so it doesn’t distract too much from the other elements as you have a more cramped space to work with compared to your landing page.
Get your readers to click on your CTA! Choose a contrasting color and place compelling text (like I just discussed above).
When your readers click the CTA, you can lead them to the Thank You page you designed earlier, which is ideal. Another way you can do it is to create another version of your Thank You Page that has an additional link that takes them back to the blog post they were reading. This is so that if they weren’t done reading, they can pick up where they left off.
When you’ve created your opt-in form, you’ll need to install it in your site. Please note that you DON’T have to use ALL of them. That’s overkill, and a quick way to annoy your visitor so they skip out of your blog. Start out with two, and then change them up depending on what you find is working. It’s going to vary depending on what your audience prefers, so be open to all possibilities.
A feature box show your opt-in to your visitors when they land on your homepage, with an option to skip signing up and continuing on to your content by scrolling down. It typically does away with your navigation bar, your header, and any other distractions.
Depending on how great your headline and your copy are, a feature box has huge potential in converting your visitors to leads; quality leads at that.
Why?
If they read your headline and copy and they already want to sign up, that means you’ve hooked them with your description of what your site has to offer. If they sign up for your mailing list, they’re saying that your blog is precisely what they’re looking for. And so they’re more likely to keep you in their inbox.
It’s almost expected that a blog will have this form on the sidebar, right beside the title of your blog post. I dare say it’s a classic. However, you can switch up this classic by making it “sticky”; that is, making it visible and accessible even while your reader is scrolling through your blog.
A floating bar can be located on top or at the bottom of the page, and is normally sticky as well. It’s another good way to make your opt-in form visible and accessible even while scrolling.
When someone stumbles on your blog post and was able to read the whole thing, they like what you’ve written. Take advantage of those positive vibes they have for you to ask them to sign up to your mailing list to get even more of your content. You can also show them your opt-in form within the blog post, especially if it’s a long one.
Maybe they don’t have time right now to finish the post, and they might want to drop out halfway, but still like your content enough to sign up. At least give them the chance to do that.
A lightbox popup is a window that appears on top of the page you’re viewing in which you don’t have any options other than closing it or doing what it wants you to do (in our case, fill out the opt-in form). The popup also dims the webpage in the background so that the form stands out.
Yes, this is the next generation of the often-maligned popups. I personally don’t like them. You may not even like them.
But I included it here because a lot of marketers do say it converts well since it features a single CTA and it’s eye-catching. The question is, are the right readers converting into leads or are they the type of people who say “okay, let me indulge you just so I can read this blog post and I can always unsubscribe later”? You want readers who want to be in your email list.
If you’re going to use lightbox popups, I suggest using them responsibly, rather than just setting one up and calling it a day. You can set them to display after your reader has spent a certain time on your page, for example, so it doesn’t seem like you’re bombarding them with your opt-in at first blush. Another thing you can do is have an action trigger them, like a click on a link to download your lead magnet.
Another important note, SEO-wise: As of January 2017, Google has already begun to penalize sites that use “intrusive interstitials” on mobile search. This is another factor you have to consider if you’re thinking about using a popup and your target audience is often on their mobile devices (which is highly likely).
Meet the lightbox popup’s less aggressive cousin, the scroll box.
A scroll box normally appears in the bottom corner of the page (usually on the right) as reader is scrolling down your content. It doesn’t obstruct the view of the content and allows your reader to still read interact with the page while it’s displayed.
That’s the very bottom of your page. If your reader makes it here, they’re definitely interested, or at the very least curious about your blog. Don’t miss the chance to invite them to sign up for your email list.
Again, if your reader made it here, they’re intrigued and want to know more about you, your story, and/or your blog. Whatever their motivation is, they’re curious. Not placing an opt-in form here is wasted opportunity.
Wow. If your reader made it here, they must be really, really interested in connecting with you for whatever reason.
So add an option for them to sign up for your email list. The good news is that you don’t even have to create an entire opt-in form for this. Oftentimes, all you need to do is add a tickbox near the bottom of the form. Note: I’d leave this unticked by default. You don’t want unsubscribers later complaining that they didn’t mean to sign up for your email list.
It’s a more clingy lightbox popup.
Exit-intent popups only appear when your reader is trying to get out of the page. The page “senses” when your reader’s cursor goes up toward the “close” or “back” buttons on their browser. It’s basically a last-ditch effort to get their attention before they go.
Here are some more things to remember when you’re building your opt-in forms.
Same with your landing page, use your service’s own tracking tools or use any web analytics program to track your landing page. This enables you to find out how effective your opt-ins are.
This may seem to be a no-brainer, but adapt your form to where you’re displaying it. For example, if you want to display an opt-in form in a floating bar at the top of the page, make your copy a one-liner, as you don’t want to cover more content than necessary.
Make it easy for your readers to go back to what they were doing before they opted in. Be it exploring your homepage, reading your blog post, or researching about you, you’ve interrupted enough. It should be painless for them to go back to your blog.
Content is still king, after all. The less intrusive your opt-in form is, the more goodwill you get from your reader and they’ll be more likely to sign up when they’re ready.
As with everything, test which ones work for your blog. Not just the content of your opt-in forms, but where you place them, how they appear, how animated they are (some opt-ins jiggle and move just to catch your reader’s eye), and how many of them to display.
When you’re just starting out, you’ll want to minimize costs as much as possible. It’s tempting to just send a mass email to your first 20 subscribers, with the emails you collected on the Bcc field.
Yeah, don’t do that.
Use a professional email marketing service. They cost a little bit, but here are some reasons why you’re better off using one instead of just sending from your email.
There are a lot of email marketing services out there that can provide you with all the tools you need to create and execute your email marketing. Those tools include list management (collection and storage of reader data), customizable templates, analytics, automated emails, testing, approved bulk email sending, and legally compliant emails (especially subscription handling).
But how do you choose the right one? Here are 3 main factors to consider when selecting your email marketing service.
You’ll want your email service to provide various professional-looking templates so you don’t have to spend a lot of time designing it and you can focus more on what your emails contain. You’ll also want these templates to still be easily customizable if you want to change something, and you want these templates to look good even on mobile devices.
Social media is an integral part of any marketing effort, even email marketing, so you’ll want to have an option to easily share your email on social media. Also, you’ll want the ability to send emails on a set schedule, so you can compose multiple emails in one sitting and have them go out when you want them to.
Testing different versions of your email is vital to the success of your marketing campaign, so make sure your service provider allows you to do this easily. Your provider should also allow you to segment your list when you need to.
Most importantly, you’ll want to know how your emails are doing. You want to have reports that are easy to read so you’ll quickly know how your emails are performing. Look for open rates, click-though rates, list decay, and delivery rates.
Lastly, make sure that they have reliable customer support available for you to contact if you have any questions or concerns about their services.
A good delivery percentage rate (that is, the percentage of emails that actually make it to your leads’ email inboxes) is above 95%. You’ll want a provider that has invested in accreditation and authentication tools that verify your identity as a sender of legitimate, solicited emails (not a spender of spam).

Take a look at their policies as well. If they have reasonable opt-in requirements and they don’t allow you to use lists that were bought or obtained illegally, there’s a very good chance that they’re reputable and that they’re able to literally deliver your emails. Your service provider should also be compliant with CAN-SPAM or whatever laws are applicable to the country you’re going to send your emails in.
So many features, yet you only have so many dollars to spend. Because you want to minimize your costs, you want a provider that allows you a free trial so you’ll know if they fit your needs before you commit to a monthly fee.
Overall, your email marketing service provider should offer excellent, reliable, and affordable service that allows you to reach your leads with engaging, well-designed emails.
As I’ve said, there are a lot of email marketing services out there. Some are oldies but goodies, and some are new kids on the block. Here’s a list of the popular ones and who they’re best for.
Best for: non-tech savvy beginners looking for a simple solution
Best for: beginners looking for a scalable solution up to advanced-level
Best for: intermediate-level bloggers looking for an all-in-one solution
Best for: advanced-level bloggers with a little bit more budget
Setting up your list will vary with your email marketing service provider, but the steps are generally straightforward and properly documented. If you already have an initial list on a spreadsheet, it’s relatively easy to upload to the service.
Use an email address where replies are monitored so your leads can reply to your emails and you can engage with them personally. Your sender name is another chance to get personal with your leads. If recipients don’t know who you are, they might not open your email or worse, forget that they signed up and mark your email as spam.
You can use your first name then use “from [your blog name]” as your last name so there’s a personal element plus branding, and your leads are aware where the email is coming from.
Again, depending on the service, they will either have their own tracking tools or have their own tools to integrate your chosen web analytics software, usually Google Analytics.
Now that you have most of the logistics and essential pages set up, it’s time to write the emails that you’re going to send to your leads. Most email marketing service providers, particularly the ones I’ve named above, have complete templates that you just have to customize with your own content.
If you’re already selling your own product, now’s a good time to write your email series to build up anticipation for your product launch. But what if you’re just starting to build your list and don’t know what to email your leads just yet? Here are some ideas.
Out of all the emails you will send, this is the most important one.

A welcome email is your leads’ first glimpse of you, your personality, your blog, and what you have to offer. First impressions can make or break your relationship with your leads, so make sure you get your welcome email right. Here are some pointers for creating an effective welcome email.
An email with your blog posts is the easiest type of email to start with. It can be a “just in case you missed it” type of email, where you include a roundup of your blog posts for that week or for the last two weeks. Or, to make them feel special, you can send them your blog post 24 hours before you post them. It’s nice to have first dibs on something before anyone else sees it.
Aside from first dibs on your pending blog post, surprise your leads with bonus blog posts once in a while that are not accessible to anyone but them. It’s another nice way to make them feel special.
Share a shortcut or a tip that your audience can do that’s helpful but is too short to write an entire blog post about.
If you’re comfortable sharing your story or even snippets of it, this is your chance. The aim is not to make it a “Dear Diary” series, but to make you as relatable as possible.
But if you aren’t comfortable sharing private stuff, try sharing a few behind-the-scenes peeks of you. You can share photos of you working on your blog, photos of your workdesk, or excerpts of upcoming blog posts. This would work especially well when you’re working on a product that you’re going to offer on your blog.
Got tapped for a guest blogging opportunity? Getting interviewed for a podcast or webinar? Going to be out of touch for a while? Major milestone that you want to share? Let your audience know what’s up. You can also use this to announce upcoming events related to your niche.
Reddit has this subreddit where anyone can post who they are and what they do, and then invite people to ask them anything. If you have a small email list, you can do something like this and then email the answers to the best questions back in an FAQ format to your audience after a couple of cycles.

Better yet, you can make it into a blog post or even have it as a page in your blog. You’ll learn a lot about what your audience wants from you and you get to promote your email list through it as well.
The short answer: it depends.
You don’t want to be all up in your leads’ faces every day, because that’s just exhausting; both for them and for you. Imagine having to write articles for your blog AND having to write email updates every day.
Unless you’re a news blog, this is a big NOPE.
However, email too rarely and you risk your leads forgetting about you. You don’t want that, of course.
The thing is, the perfect balance depends on your niche and what you’re actually emailing.
Once a week generally works as an acceptable minimum. Take note that this may go up to three or four times a week if you’re selling something.
Sending an email to your leads may seem scary at first. There are so many subtleties that can be deal-breakers for your audience. And unlike blog posts that you can edit afterward if you make mistakes, you can’t take back an email after it’s been sent.
So go through this checklist of everything you need to think about before you hit Send.
Be concise: your subject line should be no longer than 40 characters. Somehow, those 40 characters must focus on a benefit, create a sense of urgency, and get your recipient to open the email.
Also, don’t be misleading here in an effort to get your recipients to open your email. Disappointment will push them to unsubscribe, and you definitely don’t want that.
This one is easy to overlook, but really important. You want your recipients to think that you see them as people and not just email addresses. Depending on the information you asked your leads, you can personalize this to “Hello, [their name]” but if you do this, you need to make sure that your list is complete and you’re not sending emails with “Hello, [NAME ERROR]” on them.
How you write this depends on what type of email you’re writing. Whatever it is, though, always keep in mind the value of what you’re giving them and highlight that. Assume that your recipients are always thinking “What’s in it for me?” as they’re reading.
Also, if you must use images, don’t use them “just because.” Make sure it complements your content. Don’t forget your alt-text here either. If for some reason your recipients’ email client don’t load your images properly, you’ll want them to see a descriptive alt-text instead so they’ll know that there was supposed to be an image there and what it would have looked like.
If you have a CTA button, make it extremely clear. However, some images may not render on your recipients’ email, so think twice if you absolutely need to use a button when a link will suffice.
However you present your CTA, make sure you’re clear about what you want them to do next. Unless it’s a roundup of blog posts your readers expect multiple links, avoid placing multiple CTAs in an email.
Ideally, your email footer should have social sharing icons plus an “email to friend” button.
If you’re sending emails to residents of the US, the CAN-SPAM Act requires you to include your physical address and a clear, undisguised link to unsubscribe to your emails. If you’re concerned about identity theft (and you should), you can get a PO Box address or a private mailbox you’ve registered with a commercial mail agency.
Some of your recipients may prefer a plain-text message or may not be able to accept an HTML message for whatever reason. Most email service providers allow you to generate a plain-text version of your email on their editor.
Make sure that your email is easily read on mobile devices. Some simple steps you can take include keeping your design on a single column format, not including images more than 500 pixels wide, and setting your font size to at least 14-pt.
Most email services have a built-in spam checker to make sure there aren’t too many spammy-sounding words or phrases that could get your email flagged as spam by your recipients’ email clients.
Send the email to yourself first and check everything from the subject line down to the footer for any errors or anything that looks out of place. Verify as well if your links work correctly and if the images display correctly. Lastly, check your email on various devices to see what it looks like.
That’s already a whole LOT about emails, but here are just some more reminders when emailing your mailing list.
It’s much better to pencil this in your schedule so you don’t rush to draft an email at the last minute. Doing it last-minute sets you up for more mistakes, and email mistakes are difficult to correct.

That said, don’t pressure yourself to send a long email every time. This can lead to you ending up not sending anything because you think it’s not long enough. Stick to your schedule and send that email, no matter how short it is. As long as your email is high-quality, being consistent is more important than sending a long email.
Quite simply, if you’re not providing value in your emails, your leads will unsubscribe.
Emailing your leads every week is hard. Even harder when you put “creating blog posts” and doing your projects on top of it. Even more so if you’re just blogging on the side. At this point it’s tempting to outsource this task.
But your leads signed up on your email list because of you. What makes you different from other bloggers in your niche is your personality. And no matter how great of a writer someone else is, they’ll never be able to replace that. So even if it’s hard, even if you end up sending shorter emails than you’d like, just keep at it. You’ll be glad you did.
Just to recap, the basics of building your email list are:
If you’re determined to make money from blogging, having an interested, engaged email list is a crucial part of your success. So let me give you some more reminders when building your email list.
Obviously, just starting an email list involves considerable time and effort. You may be tempted to just say “Screw this. I’m going to buy an email list then I’ll be done in a day.”
Bad idea. Terrible, horrible, no good, very bad idea.
First off, any reputable email service provider won’t let you send to purchased lists. Their reputation depends on it as well, so they’re vigilant in keeping lists that did NOT opt-in off their databases and off their systems.
If by some miracle you got to sneak in your purchased list to your email service, most of these addresses are likely to be older and inactive or even nonexistent. When you try to send emails to these addresses, they bounce. A high percentage of bounced emails tells your recipients’ email provider (e.g. Gmail, Yahoo! Mail) that your email address sends spam.
Worse, one of those email address might be a “spam trap,” or email addresses specifically set up to find email addresses sending emails to questionable lists. When your email address gets flagged as a “spammer,” it lowers your sender reputation, resulting in fewer emails from your email address getting through to any inbox.
Any emails that do get through to inboxes will likely be flagged as spam by the recipients because they don’t even know who you are and they never signed up, or they unsubscribe. Either way, your email service provider will know what’s up and if they find out you’re using an email list that’s not opted-in, they can terminate your agreement and block you from using their service.
If the above reasons don’t convince you, how about this: It’s against the law.
Would you risk your blog, your reputation, and your criminal record for a few hours’ worth of work?
So you’ve gotten your leads in your email list. That’s it, isn’t it?
Nope. It’s just as easy for them to click on your email and read through it as it is for them to click Unsubscribe.
You’ll score some hits and misses with your emails, definitely. No matter how narrow your niche is, you won’t be able to please everyone every single time.
What you can do is to always provide valuable content in your emails, just like how you strive to provide value in your blog posts. Even if your emails aren’t always written flawlessly, if at least some of your recipients find your emails valuable, they’ll keep you in their inbox.
These are your most important leads because they are the most likely to be interested in anything you have to offer. And when it’s time for you to sell them something, they’ll be the ones most likely to buy it because they trust that what you’re selling them is valuable.
As if I haven’t drilled down how important testing is in every step in the email list building journey.
You won’t know if what you’re doing is working if you don’t put it to the test.
So always test components of your landing page, your opt-in forms, and your emails.
A good rule of thumb here is to think of what you wouldn’t want to be done to your information by someone you trust. You wouldn’t want them to sell your information, or give them to some you don’t know, or post them publicly. So do the same with the information you have.
It starts with your blog. Make sure that you always have the latest security updates in place for your blog. Establish additional trust by putting a privacy policy in place, if you haven’t already. Don’t know how to word it? You can go to FreePrivacyPolicy.com or TermsFeed to generate a privacy policy.
It’s also good practice to read your email service provider’s privacy policy to know how they’re protecting your information and your email lists’ information.
Whatever niche you’re in, however you want to monetize your blog, you need to set up an email list and you need to convince your visitors to sign up. The sooner you get started, the sooner you’ll grow your email list.

So start TODAY!
Was this guide useful? Which tips worked for you? How did you start building your email list? Share your experience plus tips and tricks below!
JoAnne is your average, everyday, sane stay-at-home mom who believes in the power of the internet to make dreams come true. She has an insatiable appetite for chocolate, as well as all things internet marketing. She keeps up with the latest trends in blogging, affiliate marketing, e-commerce, and more.
