(2) comments
Add Your Reply

You’ve created your product. Now, you’re ready to sell it! Here are essential strategies and techniques on how to sell your digital products. Plus, learn about a couple of things that rookie bloggers are rarely taught.
With so many ecommerce platforms, you can start selling in minutes. Literally. IF you know what you’re doing.
But if it’s your first time, you might want to hold off and learn a little more before jumping in.
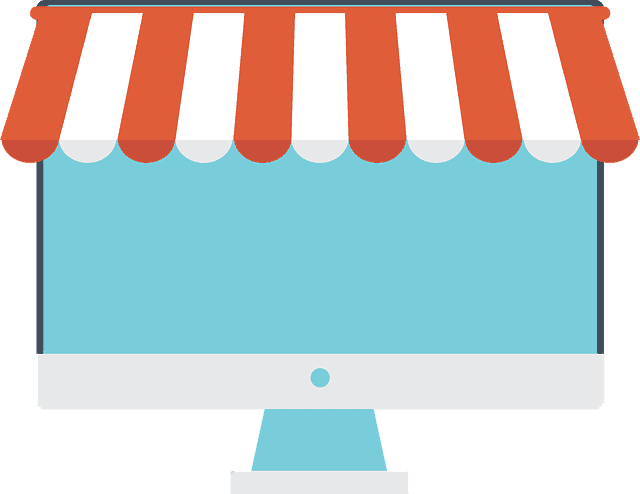
Because we’re talking about digital products, I’ll classify ecommerce sites for the sake of this discussion as online marketplaces and digital sales services.
Online marketplaces are ecommerce websites where products and services are provided by multiple third parties, with the transactions being handled by the marketplace operator. The big ones are Amazon, eBay, Etsy, and Envato Market.

Like this, but digital.
Digital sales services, on the other hand, are applications that allow you to maintain your own ecommerce store. Some of them integrate with current websites, while others are ready-made online store systems that you can use for a monthly fee or a percentage of your sales.
However you want to sell your digital product, there will be advantages and disadvantages. Below are the pros and cons of each type of ecommerce site.
The big marketplaces have thousands of customers who have already bought from them and are likely to keep buying.
With thousands of customers, chances are you’ll reach a lot of them.
They’ll push the products that they sell because that’s where they profit.
All a customer wants for a great user experience are built into their site: product comparisons, reviews, checkout, and payment.

They don’t collect fees, but they get a commission from all sales. Depending on the company and the product, they may take as high as 25%. Amazon can even take as high as 65% for Kindle ebooks.
Having thousands of customers means having thousands of other sellers. Your brand may become just another face in the crowd.
Their platform, their rules. Depending on the company, there is a roster of rules regarding what products to sell.
Because the primary focus is on the products, selling through marketplaces won’t do much to help you grow your brand.
Not that you need access to their credit card information, but having access to their emails, at least, would allow you to have a customer relationship with them. If you sell through eBay, they’re eBay’s customers, not yours.
You’re free to use your brand everywhere, and there are no restrictions to the type of product you can sell.
Your store, your rules. You get to decide how the product gallery looks, how the checkout process goes, what payment methods you take, everything.
Having your customers’ names and email addresses means you can cultivate a relationship with them. You can introduce them to your blogs, to your other offerings in the future, and they can email you back if they have questions about the product.
Want to celebrate a blog milestone with a sale? Want to reward customers with coupons? Go ahead!
Complete control over your own marketing and advertising can be costly: time, resources, skills. Not to mention it’s easy to screw up this aspect.
It’s a good thing to own every interaction with your customer, but again, it can be very costly in terms of time and resources.
Without the framework of the large marketplace sites, the cost of operating and maintaining a site falls squarely on your shoulders. Tech issues and refunds are solely yours to handle.
So, which one is right for you?
Short answer: Selling in both places could work for you.
A good short-term strategy would be to put out a product in a big marketplace to take advantage of the visibility. Meanwhile, focus on getting traffic to your blog and your own store, where you have the majority of your products.
In the long term, shift the focus from your marketplace products toward your own store. Control over your own digital assets and your own customer base is critical to the continued success of your blogging journey.
That said, how do you know which digital sales service to go with?
With so many options out there, I’m sure there’s one with everything you’re looking for. But for starters, here are the things to consider:
How many files can you store and how secure are your files in terms of access and piracy?
Is it simple and straightforward? How many steps are there from clicking “Buy” to downloading your file?
How many modes of payment are accepted? At the very least, do they cover the usual ones (PayPal and major credit cards)?
How do they handle fraudulent transactions? How long does it usually take for a dispute to be resolved?
How easy is it to access your customers’ information? Will you have records of all purchases per customer (valuable information when it comes to refund requests and retargeting)?
It’s particularly important that they are integrated with the email marketing tool you’re using (e.g., Aweber, ConvertKit, etc.)
Can you make your own discount coupons, and can you track who’s using which coupons? How easy is it to apply special promotions or have a sale?
Taxes vary per area. Can your system calculate it accurately?
Like I said, there are so many services out there, but the more popular ones for digital assets are:
If you chose WordPress for your blog like I told you to, you’re in luck, because there are plugins you can install right on your blog so you can sell digital products. The same criteria I listed above apply when choosing the right plugin for you. In addition, look for a plugin that has an extension library so you can add features to your online store as you expand.
The more popular WordPress plugins for ecommerce are:
Now that you have your store set up, it’s time to prepare for your product launch. Here’s a rundown of what to do to get ready.
You have a beautiful, polished, finished product. Let it go. No more tweaking, no more final touches, no more “I just want to change this little bit.” You’re done with your product. Sell what you have.
In the next sections, I’ll talk about the steps toward a successful launch. When you’re familiar with them, go back and decide which step you’re going to do, how long it’s going to take, and plan them ahead.
Just like when you created your product, there has to be specific dates for everything, especially Launch Day. That date better be encircled in your calendar. This gives you a clear view of the finish line so you’re motivated every step of the way.

Launch Day is typically 4 to 6 weeks after you’ve created your digital product. If you want a bigger, wider launch, you might have to extend to 8 weeks. Any longer than that and anticipation starts to wane. Remember, people have limited attention spans. Make them wait longer than they’ll have to and they’ll lose interest.
You’ll also have to allot 2 to 3 weeks after launch for postlaunch activities and communications. After that, the intense work should be done.
If you followed my advice, you should have created your sales page while you were creating your product. Now you’ll need to overhaul it because it should now be selling the actual product, not the minimum viable product you had. Plus, on Launch Day, it should lead to the payment step, not a form to sign up to the waiting list.
Here are the essential elements of an awesome sales page:
The best sales pages start off strong: with a riveting statement that speaks directly to your target audience. Get straight to what your target audience wants and promise them an irresistible result if they stick around and read on.
Your headline may well be the most important part of your sales page. If you don’t get it right, no one will read the rest of what you have to say.
Say for example you’re selling an ebook that teaches how to write effectively aimed at readers wanting to become freelance writers. A compelling headline could be:
“Write your way to financial independence!”
That short headline zeroes in to the target audience (“Write!” speaks to aspiring writers) and makes a promise (“financial independence”) that demands attention.
The copy is where you make good on that promise. Learning how to compose effective sales copy can’t be learned in a paragraph. It’s something that takes practice. A LOT of practice. But here are some basics to help you get started:
It’s tempting to just list down the features here. Well, yes, you’ll need to list these down, but they’ll need to be featured further down the page. What you want to highlight at this point are the benefits; that is, what your target audience will get out of it.
If you’ve familiarized yourself thoroughly with your audience’s pain points, such as when you were creating your value proposition, you’ll know exactly what your product needs to solve. That’s the benefit to them. You’re positioning your product to be THE solution to that thing they’re worried about.

Following our e-book example, one of the chapters may be about common grammar mistakes that you see everywhere.
Feature: “Contains a whole chapter with 50 common grammar mistakes”
Benefit: “Learn these mistakes so you never have to make them”
See the difference? The feature answers “what?” while the benefit answers “why?”
Include at least 5 benefits of your product, after which paint them the outcome that they’ll be able to achieve with your product.
In our example, the outcome could be:
“Imagine having the skills to be able to work anytime, anywhere, without having to report to anyone or commute to a windowless office.”
For your target audience of aspiring freelance writers who are currently holding down 9-to-5 jobs and want to change their lives, this picture you’re painting would definitely resonate.
It’s easy to overlook, but after highlighting the benefits, introduce your product by name. Introduce it as THE solution they’ve been looking for.
Besides, people won’t buy it if they don’t know what it’s called.
Here, you can now list the features of your product, i.e., what your customer will get when they buy it. If you’re selling an ecourse, you can list down the modules. If you’re selling an ebook, you can list down the chapters.
You don’t even need to get this specific here. Instead of the chapters, you can list down the important things that they can expect to learn from your ecourse or ebook, then give a more detailed explanation of what’s included in your product further down the page.
You may not want to give too much away in the hopes of making it more mysterious and attractive to your customers, but being transparent about what’s included will help your customer decide if your product is right for them. Also, being very clear about what they can expect will help them trust you more.
Remember your test group and the feedback you got from them? Time to get the more positive ones and include them in your sales page.
Keep in mind, though, that these testimonials are not to convince yourself that your product is awesome. It’s to convince your potential customers that your product indeed solves their problems.
An example of a great testimonial from your test group could go like this:
I’m a single parent of two, working 50-hour weeks and tired and unhappy. I’ve been looking for a way to earn from home so I can spend more time with my kids. Because I like writing but don’t have much talent, I started looking for resources online that can help me improve my writing.
I stumbled upon this blog one day and learned so many writing tips in the half-hour it took to get through his best posts. I’ve been a subscriber ever since.
When I heard this ebook was coming out, I grabbed the chance to get it early. And let me tell you, I don’t regret it one bit. I’ve gone through so many books and courses about writing, and this book is one of the most comprehensive, most helpful guides that I’ve ever had.
The tips it had on composing a compelling letter helped me create an awesome cover letter and landed me my first writing job! Now I work when I want to, where I want to, and this flexibility has allowed me to spend more quality time with my family.
This book changed my life, and I have no doubt that it will change yours.
The first paragraph establishes that this person is just like the person reading your sales page, probably with different specific problems, but looking for the same thing (i.e., looking for resources to improve their writing). The second paragraph establishes why you should be trusted.
The third paragraph assures your potential customer that your product is helpful and that it’s different from other products out there. The fourth paragraph tells how exactly helpful the book was. The fifth paragraph is an overall affirmation that your ebook is life-changing.
Rarely will your test group submit a testimonial this detailed and in this format without prompting. The questions in your survey form will definitely help, but you’ll probably have to compile and edit this yourself. I would recommend asking for permission from the people whose answers you’ll be using, as well as showing them the edited testimonial and asking if there’s anything you got incorrect, or if there’s anything they want to add.
It’s easier for you if you can ask your test group to give an outright testimonial. Of course, it’ll take some effort on their part, and it might take some convincing. But if you created an excellent product, I’m sure your test group will be willing to oblige.
There’s another way to get a testimonial, which I absolutely do not recommend: buying or creating fake testimonials. It’s just not worth it. For one thing, your audience isn’t above actually looking up these people. If you get exposed, there goes your hard-earned reputation. Plus, as I said, if you’ve created an excellent product, people will tell you so, and they’ll gladly tell other people.
But what if you can’t get a testimonial?
If your product is so terrible that you can’t get a positive word about it, pardon me, but why are you even trying to sell it? Go through the negative feedback and go back to the drawing board. It could be that the world isn’t ready for your product yet, or that a major overhaul is due.
I’m sure your target audience would like to know who’s offering this great product. Humanize the experience. Make it about an actual person wanting to help other people.

That said, your readers would probably want to know if you are, indeed, qualified and experienced enough to provide a solution like this. If you lack the qualifications, again, don’t make them up. People will easily find out and you’ll never be able to recover from that.
If you were able to produce this product through self-study and sheer determination, and not because you had a college degree in it, tell your target audience that. Tell your story. Being authentic trumps certifications that don’t mean anything.
If there is an opportunity to incorporate video in your sales page, take it. Video increases the amount of time a potential customer is on your page. You can use video to introduce yourself (to prove you’re a real person!), give a walkthrough of your product, or for your testimonials.
Just don’t forget to turn off the autoplay function, especially if your video is a long way from your headline. If your reader wants to watch the video, they’ll click it.
It’s great to have a section like this to answer any questions or concerns your customer may have regarding the product before they even ask. You can get inspiration from the questions that your test group asked. Also, you can get inspiration from all the questions you asked in your head when you were doing your product research and reading up on competing products.

The FAQ section is also a great chance to overcome your customers’ objections. The specific questions will vary per product, of course, but it can all be boiled down to:
“Will this product work for me?”
When you are able to address your customers’ doubts, concerns, and objections, you’ll be able to bring in more sales.
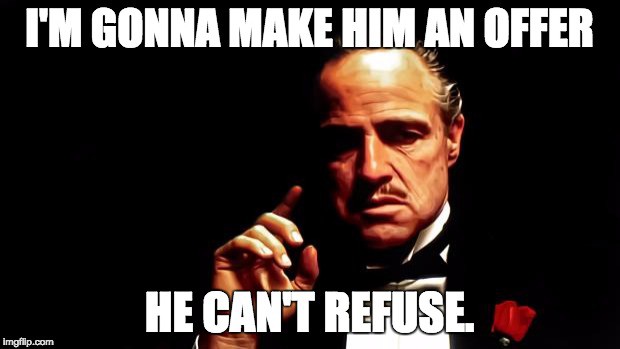
Why go all the way down here before you can see the price? It’s because that’s a surefire way of turning away your customers, especially if you have a mid- to high-priced product. Potential customers see the price first and say “$97? That’s too much, I can’t afford it.” and promptly click away.
Give yourself a fighting chance. Remember when I told you about value-based pricing? Make sure to describe all the benefits and overcome possible objections before you give them the price. Doing so makes it clear to the customer what the value of your product is, and then offer a price that’s a bargain compared to all the value that your product will provide.
In short, make sure you show your prospects that your product is worth 10 times what you’re charging.
This way, it becomes an offer they can’t refuse.
People tend to place a higher value on an object that’s in scarce supply or about to run out. Obviously, you can’t pull off this strategy with a lot of digital products (I mean, seriously, how can you run out of ebooks?), but you can do a scarcity-based promotion, such that a promo price is only available for only the first X customers who buy the product.
You can also employ a time-based promotion instead. A limited-time only offer wherein the promo price is only available for a few days or hours could also work for your product.
An example of how you can apply a time-based promotion is when you have three different deadlines: the week before Launch Day, Launch Day proper, and 2 weeks after Launch Day. If customers sign up for your waiting list up to 7 days before Launch Day, they get 30% off plus an exclusive freebie. If they sign up 6 days before Launch Day, they get 20% off. Finally, if they purchase from Launch Day up to 14 days afterward, they get 10% off. You can adjust this depending on the price of your product.
With webinars, you don’t even have to make up the scarcity, because there should really only be a limited number of slots for a webinar. It’s usually limited by the webinar software you use, plus you can’t guarantee that you can provide an optimal experience if there’s just too many participants. Plus points for drama if you can show how many people have already confirmed their slot for the webinar.
Unless your sales page is being read by a subscriber, your potential customer doesn’t know you from Adam. People are tired of being lied to, scammed, and taken advantage of. Take that burden of risk from their shoulders and put it on yours.
How?
Simple. Make a 100% satisfaction guarantee, or their money back. The usual deadline for them to claim their refund is 30 days, which is usually enough for a customer to know that your product isn’t a great fit. If it’s a more expensive product, or if it’s an ecourse that spans 8 weeks, it makes more sense to extend it to 60 days.
Since we’re dealing with digital products, refunds are relatively less of a burden to you than physical products (where you have to think logistics like shipping and handling of returned items). So if a customer asks for their money back, just refund it (as long as it’s within the refund policy).
Don’t give your customer the runaround. Their great customer experience from start to finish, even if they asked for a refund, will make it likely that your customer will refer you to their network who do need your product.
A positive reputation is worth more than any refund.
Readers who don’t click your CTA don’t buy.
The purpose of all the fussing over your sales copy is to convince whoever’s reading your sales page to click this button.
Recall that I gave some tips for a great CTA here. However, your CTA for your sales page is a lot more high-stakes than asking a reader to subscribe to your email list. Below are some additional tips for effective CTA copy on your sales page:
For our ebook example, instead of the straightforward but oft-used “Buy Now,” try using “Teach Me To Write Now” or “I Want My Ebook Today.” Notice that these are written in the first person, not in the second person as is usual. Again, it’s an attempt at standing out and being unique.
Long copy? Don’t be afraid to place multiple CTA buttons throughout the page. Strategic places to place CTA buttons would be after the benefits and after testimonials, in case your reader is already convinced before coming to the end of the sales copy.
These multiple CTAs should point to a single action, though. On a blog post, you can have multiple CTAs with different actions, but on a sales page, you’ll want your reader to buy. That’s it. So don’t place a CTA that leads somewhere else on there.
Another reason to deviate from the usual “Buy Now” is while it tells your customers exactly what to do, it focuses on the fact that they have to open their wallets and part with their money. Which is what you’re trying to get them to do, but that’s beside the point. The point is, if you focus more on that they get, they’ll be more inclined to open that wallet.

It sounds like some psychological voodoo, and it probably is, but it works. Instead of focusing on what they need to do, focus on what they get.
The page after your customers pay for the product and download normally just says something like “Thank you for your purchase” with nothing else to do but click Close.
It’s such a waste! When customers land here, it means they’ve already purchased from you. At this point, an additional request (especially if it’s free) seems less of an imposition, and they’re more likely to say “yes” to anything you ask them to do.
Start with a heartfelt message of gratitude for their purchase. And then you can add something as simple as a CTA button to go back to your blog (not the sales page; that’s just annoying).
You can also place links to your top 3 blog posts. Or you can invite them to subscribe to your blog, if they haven’t already. You can even use this page for promotion. Place some social buttons on there and invite them to tell their friends about your product.
I’ve talked about the importance of blog design here. Just because we’re creating a content-centric sales page doesn’t mean we can disregard design. In fact, it may be crucial to the success of your sales page.
Here are some points to remember:
As with your blog pages, make sure that your sales page looks good on all devices.
It’s even more important for your sales page to cater to your readers who tend to skim headlines instead of reading them more thoroughly. Listing benefits? Use bullets. Introducing a new section? Use subheadings.
Make it easy on your readers to scroll down, absorb the information, and ultimately purchase your product.
Visuals are powerful. You’d want to use pictures of your product when you introduce it. If you can, get your test group’s photos for their testimonials (don’t forget to ask their permission to display their pictures!). Most of all, you’ll want to use your photo when you introduce yourself. It’s all about making the experience as authentic as possible.
There should be nowhere else to click on the page except your CTA and the close button. Your readers are already distracted. Don’t give them any more distractions.
Use whitespace and other visual elements to draw your readers’ eyes to your CTAs.
Using a color that you already used will just confuse and distract your reader. You want to make sure that your readers know exactly where to click when they’re ready to buy.
Don’t go extreme and make your button take over the page, but make it sizable enough to be noticed against the background.
If it looks like just another text field, even if it’s a contrasting color, your reader will probably just skip over it. Rounded edges, gradient colors, and clever use of shadows can help achieve a clickable look for your CTA.
If you’re already using Google Analytics to track your blog pages, you can also set it up to track your sales pages. This is outside the scope of this article, but you can refer to this article from Google Analytics Help if you want to know more.
A/B testing sounds like something you do with your blood, but it simply means creating two different variations of your sales page and see which version performs better, i.e., has more clicks on your CTAs. This is why it’s important to track your sales page.
You can test every element of your sales page, but remember that at any given testing period, test only one specific element. For example, if you want to test your CTA’s color, change only that and nothing else. Your CTA should still have the same size, same copy, same position. The rest of your sales copy should stay the same. This way, any difference in the rate of clicks to your CTA can be attributed solely to the CTA color and not anything else.

A/B testing should ideally be done throughout the entire launch process because this helps you determine the optimal elements of your sales page and retain those.
There’s nothing more frustrating than setting all this up, only to fail at critical junctions like clicking on the link on your sales email and having an error window pop up, or worse, clicking on your CTA and having nothing happen.
Test the flow yourself. Make sure the link to your sales page is working and is therefore ready to send to your mailing list. Send it out to yourself and some other testers and make sure it’s working on most devices.
More importantly, make sure that your CTA (or CTAs if you have more than one) works as expected. Make a test purchase yourself, or have testers make test purchases and then refund them. If you’re comfortable with code, you can also use PayPal Sandbox to test your purchase process without touching any live PayPal accounts.
Once this is all set up, you can officially start selling!
All your bags are packed, and you’re ready to launch your digital product into orbit!
I wish I could say that it’s as simple as taking your sales page live.
I mean, you can, but you’ll want to sell as many products as possible, am I right? For you to achieve a decent profit from launching your product, you have to do some marketing and promotion first. Here are some strategies.
The purpose of prelaunch marketing is to target potential buyers of your product to get them hooked even before the product is available. This is a chance for you to introduce yourself, your blog, your brand, and your product, which builds trust.
These customers that are on board early are more likely to help you spread the word about your product, expanding your audience and building your online reputation. They only do this when they are satisfied with the entire experience, so it’s your job to make sure they are.
The first people you want to get psyched about your product launch are your existing audience: your subscribers, your regular readers, even your not-so-regular readers, your social media followers, and everyone else who knows your blog even exists. Here are some tactics to hook them early on.
While you’re working on your product, share some bits here and there on your blog and social media. Let them know you’re working on something. Peeks behind the scenes are popular here.
For example, if you’re releasing an album, post a line or two on social media and place a hashtag #comingsoon. If it worked for Taylor Swift, it can work for you. If you’re going the ebook route, you can share a paragraph on your blog as a teaser, saying this is for an upcoming project. Photos of you filming a video can also work if you’re releasing an ecourse.

You can, and should, ask for feedback this early. You can gauge by the responses if your audience is ready for the product you want to release. If the response is lukewarm, it’s probably not the right time. It’s okay to reconsider at this point rather than push for the launch when no one seems interested.
While validating your product idea, you should have already created a sales page and invited your subscribers to the waiting list for your product.
The way to introduce it is to incorporate it in your newsletter if you have one. If not, create a series of emails that build on each other so you can position your product to be the solution to their problems. A common flow that works is to state the problem, paint their dream scenario, and then say “Here’s the solution!” with a link to your sales page detailing the product.
Not everyone who reads your blog is a subscriber. Address your regular readers as well with a series of blog posts that build on each other; similar to what you’re doing with email. Create a blog post or posts about the problem, then in succeeding posts, let on that there’s a solution and if they want dibs they’ll have to sign up to get on a waiting list. Include a link to your sales page.
Let even casual visitors know that you’re launching a product soon. Tease it on your homepage, sidebar, at the end of blog posts, and anywhere it makes sense to promote it without making your visitor sick. Don’t forget to add a CTA to sign up for the waiting list.
Once you’ve let your existing community know about your product, it’s time to move outward. After all, the point of launching a product is to get as many people buy it as possible. Here are some techniques you can do to increase the buzz.
Creating a unique hashtag for your product will make it easier for you and your followers or just curious people to see conversations and find relevant information regarding your product. Also, free hashtag tracking tools can give you an idea if people are talking about your product on social media and if you need to shift your focus to other strategies.
You’ve started a teaser campaign to your followers, but now it’s time to step it up. Hold a contest on your social media with a giveaway for contest entrants. There are a lot of social media contest apps out there, but they’re rarely free. If you want to host a contest yourself, make sure you follow the terms of service (check out Facebook, Twitter, and Instagram rules here). This is so easy to overlook.
For instance, did you know that you can’t involve personal Facebook timelines in your promotions? That is, you can’t ask your followers to share your status update on their timeline to enter, or share your status update on their friends’ timelines to enter. I still see promotions like these on Facebook, and they probably have no idea they’re violating Facebook’s terms of use.
So be careful here. Social media contests certainly help, but they are not the only way to build engagement.
To avoid being penalized by social media, you can host the contest right on your blog. That way you’re only bound by your own rules. If you go this route, make it easy on yourself. Make it related to your product, and avoid complicated contests.

For instance, following the ebook example we cited from the previous section (ebook for freelance writers), you can put up a blog post where readers can comment with their favorite writer and why, and the best answer wins your ebook. Another way you can do this is to have your readers post a comment with their favorite place to write and why. You don’t even have to choose the best answer; you can have your readers vote for the best answer so you can’t be accused of any bias.
There are so many ways you can do this. Just remember to create clear rules, be fair, be creative, and make it fun!
Getting closer to your launch date? Start a countdown on your social media accounts. There are a number of ways you can do this, like updating your profile picture every day or posting a status update every day showing the number of days left.
You can even do this on your own blog so that even visitors who stumble upon your blog are made aware that something is coming soon.
If you have the budget and the technical knowledge for this, you can try to do this yourself. However, since you have so much to do prelaunch, you’ll probably have to outsource this or hire a marketing agency to do this for you. If you’re just starting, this may not be a good use of your resources, but think about taking this route in your future launches.
If you haven’t already done so, now may be a good time to reach out to other bloggers in your niche. Before you do so, make sure that they aren’t offering a product that’s too similar to yours.
Since this is a short-term strategy, go straight to emailing them about your product. Be honest and straight to the point, but don’t be pushy. Tell them upfront that you’re launching a product, ask them if they’re interested in reviewing it, and ask them if they’d be interested in posting their review on their blog. Enclose your product (at no cost to them, of course) and then thank them for their time.
It’s not a surefire way, and this is more likely to work if you’ve already started reaching out to these bloggers beforehand, but at least try to do this before launching. Who knows, your product may pique the interest of a prominent blogger and you might get an endorsement of your product.
If no one bites, that’s also fine. If this is your first time to email anyone, then consider it your introduction to them. You can then try to cultivate the relationship afterward (even if they don’t reply to your initial email).
Read this article for more about planning a blogger outreach strategy.
Just because you’re on launch mode doesn’t mean you can neglect your blog. Aside from your content promoting your product, make sure you continue putting out awesome, engaging content on your blog. You want to drive organic traffic to your blog.
New visitors will be able to see that you’re launching something through your advertisements, but they got there because of your useful content. Plus, it’s sending a message to your readers that your blog isn’t just a platform for your product. It’s secondary to creating content that helps people and improves their lives.
You want to create buzz and excitement for your product. What you don’t want is to get carried away and resort to selling hype instead of the actual benefits of your product and how it can help your customers.

The promise is more binding than a pinky swear.
Going into the launch without a plan is a recipe for disaster. There are just emails and announcements that are time-bound and absolutely crucial to the success of your launch that you just cannot miss sending.
Life happens, technology fails, people drop out. It helps to have a backup plan for every step in your prelaunch just in case something goes wrong. For instance, you might want to have a backup email marketing software/service (since email is the most crucial piece of communication), as well as backup workers, if you’re outsourcing anything in this process.
Sudden events aren’t always unfortunate ones. Unexpected opportunities can also crop up. Grab them!
For instance, days before Launch Day, you hear back from a blogger you reached out to a while back wanting to interview you for a webinar. At this point, you’re probably neck-deep in to-dos, but considering this is a golden opportunity to promote your product, make room for it in your busy day. Move stuff around, outsource if you need to, but show up for that interview.
Customers tend to wait until the last possible minute to make their decision. Instead of treating this as a disadvantage, make it work for you. Intensify your email efforts and social media postings in the last 7 days before Launch Day. It’s time to email and post every day, showcasing your product benefits and reeling your audience in with your special offers.
You got people excited and talking about your product. Now it’s almost Launch Day! Here are some important points to help you survive this day and beyond.
Send out a reminder email to your subscribers and post on your social media that your product is going to be available for purchase in 24 hours. If you’re running an early-bird promotion, now’s the time to remind them that it’s the last day to take advantage of that promotion.
You’re likely to be experiencing so many emotions at this point. Make sure to give yourself time to breathe and relax. Eat and sleep well. The next few days will be even crazier, so you’ll want to steel yourself physically and mentally for this final stretch.
First thing you do on the hour: Make the sales page live!

Now announce it to the world! Send emails first to people on your waiting list announcing that your product is available to purchase now. Remind them of their special offer on this day. Next, send emails to your subscribers, again reminding them of any promotions that you have.
Next, email the bloggers you reached out to, just saying that today is your launch day. In those emails you send, include a “click to share” link, so the recipients can possibly share your sales page on their social media.
Don’t forget about your social media posts. Let loose on this day. Post on Twitter every hour and on Facebook at least three times on this day. Post to other social media sites as appropriate. You can also try to post on communities you belong to, if they allow promotion (be mindful about their rules about posting and promotions).
Finally, post about it on your blog. Share how your product benefits your readers. Share your genuine excitement and enthusiasm for your product and that you’re looking forward to hearing from your customers about any questions they may have for you, or feedback about the product.
It’s possible you might feel iffy about all the self-promotion you’re going to be doing on Launch Day. But remember, today is THE day to post A LOT about your product. One of those posts may just be the final nudge someone needs to buy your product, so post away!
Don’t think this day is all about promotion, though. People will inevitably contact you to reply to your emails, to ask for help with their purchase, to comment on your status updates, to congratulate you, and so on. It’s going to be busy, busy, busy. Keep your head up and prioritize your tasks. You’ll get through them eventually.
Yes, okay, you can relax a little now. Just a little, though. You still have a ways to go.
Your customers may send some questions and suggestions about your product during launch day, or even during your prelaunch. Compile these into an FAQ and post it on your blog 3 or 4 days after Launch Day. Send it to your subscribers too, for good measure. Those who purchased and those who didn’t can all benefit from answers to these questions.
At around this time, too, send a feedback form to all those who successfully purchased your product and encourage them to fill them out. The right questions will depend on your product, but the main question that you want them to answer is how your product helped them. Limit the number of questions as well to 5 at the maximum. Gather the answers from those feedback forms and post a roundup on your blog and again, email them to your subscribers after a few days.
Your social media promotion should still be ongoing, though not as aggressive as on Launch Day. It should trickle down at this point to reminders that you just launched a product X days ago and they can still get it for a special price.
On the final day of your special price, send out reminders to your subscribers and those who signed up for your waiting list who haven’t bought the product that it’s the last day of the special price. Lastly, your social media should also see some action on this day, reminding your followers who haven’t bought that it’s the last day of the special price of your product.
The number of downloads for your material exceeded your targets. The number of contacts in your email doubled. You’re getting emails and messages left and right about how your product was amazing and how it changed people’s lives.
In other words, your product was a success!
Now what?
Now, you’ll have to be able to take care of these new customers, as well as share your success with your oldest subscribers; the ones who were with you for every milestone prior to this successful product launch. Let your success inspire you to create more of the awesome content that helps people.
Sketch out a plan for this. Will you need a more powerful emailing software? Will your website be able to handle all the additional traffic? Should you now focus on your next product? It helps to have a plan for this, even if it’s just a rough draft.
You researched and made a great product. Created a stunning sales page for it, promoted the heck out of it, got a couple of bloggers plugging it.
Launch Day comes and goes, and no one buys.
Now what?
Well, shed some tears, dust yourself off, then assess where you’re at and decide if you’re going to pull the plug on the launch or adjust your product and/or your marketing strategy and try again.
It’s a very difficult decision, and it’s going to suck. You’re going to want to give up on ever launching a product. You may even want to give up blogging altogether.
Don’t!
A single failed launch doesn’t mean you’re never going to get it right. Fulfill the purchases, then cut your losses and move on. Experience is valuable, and I’m sure you’ll get a lot of lessons out of it. Design a better product, or come up with a better marketing strategy. It can even be material for your next blog post.
That said about possible failure, it can’t hurt to take steps to avoid it right?
First, effective scheduling. When you’re setting Launch Day, remember to map out everything to the last detail, so there’s no chance of you missing Launch Day proper. A good rule of thumb is it’s better for the launch period to be a little longer than to miss Launch Day.
Second, not measuring anything. You can’t truly gauge the success of your launch without solid data to back you up. How many subscribers did you email? How many opened your email? Did your social media updates get shared? How many times? By whom? The answers to these questions should give you a good sense of where your strengths and weaknesses are.

Third, not listening to your customers. Between your emails, social media updates, and your blog posts, your potential customers have had a lot of chances to comment and let you know if they’re excited as you are about the product, and if they have any comments about it or are telling their friends. Read through these and take the information seriously.
A successful product launch doesn’t end with introducing your product to your audience and then forgetting it. The key here isn’t to sustain the initial hoopla during the launch, but in fine-tuning your product and your marketing strategy so that your product eventually earns you a steady profit over time.
To achieve that, you have to make sure your product is benefiting your target audience, just like you promised them. Plus, you have to attract new customers and convince them to buy your product. Here are some postlaunch strategies you can do.
Here, we venture into some messy, murky realities that are rarely talked about in connection with blogging and starting to sell your own digital products.
Chargeback fraud and theft/piracy.
With the rise of the digital marketplace, it has become easier for people to take advantage of this virtual system and validate stolen customer information, get products for free, or worse, earn money from stolen products.
What sucks is that when things like this happen, merchants are almost always on the losing end. And for small merchants, this could easily cost a lot of time and money to resolve, which could totally turn into a nightmare.
Here are some ways to deal with these problems.
It’s all fun and games until someone files a chargeback.
First off, what is a chargeback?
A chargeback is a reversal of a funds transfer from a customer’s credit card that is initiated by the bank that issued the credit card. Customers dispute these charges with their issuing bank, and when the issuing bank concludes its investigation and finds it in favor of the customer (which is usually the case), they get back the funds from the merchant and apply it back to the customer’s credit card, in effect reversing the charge.
The way it’s supposed to work is that the customer is protected from purchases that they never authorized or shady merchants that never gave them their goods or gave them defective ones, and they get their funds back. That’s all well and good, right?
Of course, as with anything that involves money, people find ways to take advantage of the system.
Enter chargeback fraud. Chargeback fraud can be classified as true fraud, friendly fraud, or non-fraud.

Photo credit: cafecredit via Visual hunt | CC BY 2.0
So what happens if your customer was a victim of identity theft? You’ll lose what the customer paid and nothing more. You didn’t really lose a customer because the actual owner of the credit card had no intention of purchasing from you, and probably didn’t even know you existed. So it’s not even a lost lead on your part.
All right, so say your customer wants a refund but goes over your head and contacts their bank to dispute the charge. Just let their bank take back the money and refund the customer. It’s roundabout but everybody’s happy, right?
Nope. The bank takes a fee. From YOU. Depending on the payment provider, it can range anywhere from $15 to as high as $100. Even if the customer later cancels the chargeback (either they had a change of heart or finally recognized that transaction), you’re still out the transaction charge. Worst case, you’re out the revenue, PLUS you’re paying a fee.
There are, of course, repercussions to the customer if friendly fraud or the chargeback they filed is proven illegitimate. However, for the most part, the chargeback process highly favors the customer. Plus, disputing chargebacks is a time-consuming, expensive process.
So how can small sellers like you fight back?
Fraud prevention measures should be one of the things you assess when choosing which service you go with. Online marketplaces typically have better fraud prevention, but when you want to sell digital products straight from your blog, you’ll want to choose a service provider that has a solid fraud prevention system.
That said, you still have to keep your wits about you. If you notice an unusual number of transactions from a single credit card, or if you notice that the IP address where the transaction is coming from is not consistent with the billing address, start being suspicious.
Shopify published a detailed article here with all the documentation you’ll need if you ever have to dispute a chargeback. It seems like a lot, but if you chose the right digital service provider, you should have access to all this information easily.
It seems like such a minor detail, but if the name that appears on your customers’ credit card statement doesn’t resemble your actual blog name, you risk having customers call in to their bank and saying they don’t recognize that merchant.
If you make your refund policy and refund procedure easily accessible, you’re letting your customer know that asking for a refund is easier than asking for a chargeback. If you’re selling anything written, it should be simple to insert a refund policy, or at least a link to it, in the document. For other types of files, you can save it as a document and send it along with the products you’re selling.
Like I said, document everything. Even your correspondence should be recorded. Any correspondence through your contact page and your email has inherent tracking through metadata, which may be important later on.
Some chargebacks may claim that your product didn’t work as advertised. If you made outlandish claims about your product (e.g., apply this and make $500 per second!) the banks may favor the customer easily. Always place a disclaimer on your products. This is also why you shouldn’t put fake testimonials, because upon investigation, if it was found that those testimonials weren’t real, customers may actually have a claim based on “false advertising.”
This should help you in case you have a repeat offender. You can include evidence that this customer has done it before and therefore may not be telling the truth.
I touched about this a little bit in my previous article, but I think it’s worth mentioning again because no one really talks about piracy in terms of bloggers trying to sell their digital products.
It’s ridiculously easy to steal a digital product. The ease of access provided by the internet is both a bane and a scourge: if there’s enough demand for something, someone somewhere will figure out a way to access it for free.

The thing is, it’s one of those things that’s out of your control. Businesses big and small have tried, and not one of them has a foolproof way of piracy protection. But this doesn’t mean that you shouldn’t at least try to protect your product. Here are some ways you can possibly secure your digital products.
DMCA.com is a private company that specializes in online content protection and helps online content owners in having their content taken down from websites that distribute them illegally. Downloading their badge is as simple as going to the DMCA website and getting a free badge. Or if you’re using a WordPress site, they have a plugin for it. That’s it. There are paid options available for access to more services.
Getting a copyright for your product seems futile, but it will make it easier for you if you plan on taking legal action against content pirates. What makes copyright a bit tricky is that copyright laws vary per country, so if you plan to do this, it’s advisable to consult a local lawyer for more accurate advice.
Make your product hard to find by search bots. I know, I know, you need them to find your blog to be able to display them in your search results, but you don’t need them poking around your files. If you’re hosting your files in the same place as your blog, place them in archive files (files with .zip or .rar extensions) so search bots can’t get to them. Bonus: you can protect them with a password.
Another method of password protection you can do is to place it behind a login and password. Instead of a download link, your customer gets a username and password that they can use to access their purchases. It makes it harder for thieves while making it easy for you to track downloads and even control access. However, this says “I don’t trust you” to your customer, which may turn them off.
You can also set a time limit on your download link instead, such that your customer can’t use their download link after a set amount of time or after a certain number of downloads.
For ebooks and ecourses, you can track if there’s a plagiarized version of your work using Copyscape. Alternatively, you can use Google Alerts to give you an update anytime anyone mentions your product. Aside from having an idea about the popularity of your product and if it’s been reviewed in another website (yay for you!), you’ll know if illegal copies are being distributed (not so yay, but at least you’ll be alerted).
You can rely on Google Alerts, or you can do it yourself. This also allows you to know if your photos are being used without your permission (image search) and if your videos are being uploaded as well (video search).
Whichever protection tactics you use, the key is to make sure your product is difficult to steal and easier to buy legally. Those are the two factors that deter pirates.
But like I said, your products can still be stolen. What course of action can you take then?
If the thieves used Google services (e.g., Blogger, YouTube, Google Photos, Google Books, Google Drive, or other service) to sell or distribute your product, report it to Google so they can take your content down. Actually, you can still report it to Google if a web search for your product name yields websites that aren’t part of Google. They can prevent it from showing on their web results page, but they can’t take it down. To do that, you’ll need to…
Google gives some tips on how to contact a site’s webmaster. Ask them nicely to take down your content. They normally comply quite easily, but if they don’t, you can take it up a notch higher and contact their host. You can find this information through WhoIsHostingThis.com. Selling and distributing stolen goods are prohibited by most reputable hosting companies.
If you already have a DMCA badge, you can submit a DMCA complaint to them, although that is a paid service. Google has a free DMCA tool.
The legal recourse should be your last resort because it’s expensive and takes a long time to resolve, if ever. Consult a lawyer if you plan on taking this step.
That was a lot to take in, I bet.
To recap, here’s how to sell your digital products:
Let me just give a few reminders on selling your digital products.
No matter how great your launch strategy is, if your product sucks, no one will buy it.
On the flip side, no matter how great your product is and how much value it will give to your target audience, if your product and sales page look amateurish, and your checkout process is too hard to follow, no one will buy it.
So, make absolutely sure that you’re putting out a high-quality product AND a fabulous user experience.
Paying attention to your existing customers is essential to keep making money from blogging. Getting new customers is important, of course, but keeping them is even more crucial.
Personalize your service so that your old customers feel right at home while your new customers feel welcome. Follow-up emails after purchasing from you will do a lot to foster goodwill. The goal is to retain both sets of customers.
As I’ve said, email is the most crucial communication tool you have when launching a product, and your readers on your email list are the ones who’ll theoretically give you the most revenue.

When someone signs up for your email list, they’ve half-decided that they want more of you and your content. Email is also more personal, and as long as you’re providing value to your subscribers, they’re happy to keep getting those emails. So take care of your email list.
Because email is your most powerful communication tool, it makes sense to study how to create effective emails. There is no magic formula because different types of customers tend to like different things. However, with practice and testing, you can certainly increase the quality of your writing.
You’ll want to add your own personal touch to every step in the launch process, but if you do everything by yourself, you’ll do a shoddy job because you’re going to get lost in the details.
If there’s an opportunity to automate, do it. That said, however, there’s no reason for you to invest heavily in fancy software in the beginning. You’ll be much better off spending time and effort on creating a spectacular product. There are low-cost or even free solutions out there that cater to someone who’s just taking baby steps toward selling their digital product.
Numbers are scary.
Hell, they scare me.

Dun dun dun…
But if you don’t track anything your customers do, or measure the data you get from all the tracking, you won’t know what’s working and what isn’t.
If you don’t know the percentage of your customers who opened your email, how are you supposed to know if your email subject sucks? If you don’t know how many people purchased coming from your email, or from Facebook or Twitter, how are you supposed to know which of your promotion efforts is effective?
It’s hard to fix something if you don’t know what’s broken. So suck it up, buttercup, and crunch some numbers. Trust me, you’ll be happy you did.
So you’ve measured and analyzed your data. Hopefully. And you know what you did right and what you screwed up.
Take note of these lessons. Learn them. Don’t change what you’re doing right, and don’t make the same mistakes on your next launch.
Your product has to be consistent with the branding and messaging in your blog. Not only that, but your design needs to be consistent with the look and feel of your blog. It’s tempting to rethink your product and choose a snazzy design for it. Same for your landing page. But if the look and feel of your product are far removed from the look and feel of your blog, you risk alienating your existing customers because it doesn’t look familiar.
Whatever niche you’re blogging in, it will change. As a result, your blog and your readers evolve. Be ready to change with your niche and your audience’s ever-changing needs.
It may be your first, but let it not be your last launch!
Whether it was a success or a failure, learn everything you can from this whole process and get ready to do it again. It doesn’t have to be immediately afterward, but do it again.
A product launch will definitely be a busy time for you, and you’ll experience a rollercoaster of emotions. But it doesn’t have to be torturous. Your enthusiasm for your product will rub off on all your communications and everything you do. Choose to have fun making new connections, learning new things, and selling a digital product that you can be proud of!

Launching a product soon? Did this article help? Or have you launched your product? Tell me about it in the comments below!
JoAnne is your average, everyday, sane stay-at-home mom who believes in the power of the internet to make dreams come true. She has an insatiable appetite for chocolate, as well as all things internet marketing. She keeps up with the latest trends in blogging, affiliate marketing, e-commerce, and more.
