(4) comments
Add Your Reply

Hosting a paid webinar can be a profitable undertaking for your blog when you choose the right topic, prepare thoroughly for it, and do it the right way. In today’s article, I discuss the reason why offering webinars can be a good way to monetize your blog and how to host a paid webinar on your blog.
Just the word “webinar” can be intimidating when you’re only starting to monetize your blog or website.
Webinars seem like they’re reserved for the top bloggers in any niche. Speaking to strangers on the internet? In high-definition video and audio? With full confidence and authority?
But I’m here to tell you: Everyone can do it. Even YOU.
In this blog post, I’ll give you good reasons to offer webinars, list down how to host a paid webinar, and give you an idea of the tools you’ll need for a successful webinar.
What’s a webinar anyway?

A webinar is a video conference that uses the internet to connect the host of the webinar (that would be you) to viewers from anywhere in the world. You can also have multiple hosts, and this works particularly well for a collaboration or an interview.
It’s different from a simple video broadcast in that webinars allow interaction between the host/s and the participants through live text chat.
Below are some reasons why you should host a webinar.
Webinars turn your ideas into something concrete.
When people get ideas, some of them write books, others dictate them or draw them. You can take your ideas and turn them into a video.
Webinars establish your authority.
The truth is that not everyone can host webinars, and certainly not everyone can host successful webinars.
Webinars forge a distinct bond with your audience.
Watching and interacting with you live is the next best thing to interacting with you in person. Webinars allow your audience to get as close to you as the internet will allow and gives them a face and a voice to go with your blog, which is a powerful thing when you already have a solid reader base for your blog.
You can offer both free and paid webinars, but what’s the difference between them and how can you make the transition from hosting free webinars to paid webinars?
Free webinars are usually intended to build awareness, gain audience trust, and generate leads. They’re also frequently used to sell products or services, whether your own or your affiliates’, though it’s important to note that not all free webinars have to end with selling a product or service.

Paid webinars, on the other hand, are webinars where your audience pays to participate. They’re not primarily for sales but to actually teach a valuable skill or provide in-depth information that you wouldn’t usually get from free webinars.
Another difference you can expect with paid webinars is that your audience is going to expect more from paid webinars than from free ones. They’re going to expect more high-quality information, more time for the lesson, more time to ask questions, and at the end of the webinar, they expect to learn something new that they can immediately apply.
Before you even decide to go into paid webinars, hold free webinars and learn as much as you can from them. Which topics did people flock to see, and which ones bombed? What timeslot proved to be the most popular? How long into the webinar before people started dropping out? Have you ever received feedback that you weren’t able to explain some things clearly?
Learn as much as you can and polish your paid webinar before launching it. Having people pay for a webinar that is not worth the time and money results in dissatisfaction and that bad impression for a single webinar could quickly ruin your audience’s impression of your other products and services, as well as you and your blog in general.
People who have experience in attending free webinars expect (or at least, not at all surprised) to receive a sales pitch at the end, usually an upsell for a one-on-one training session or a full e-course. And in theory, you can upsell in your paid webinar, too, but should you?
Personally, I think it leaves a bad taste in your audience’s mouth. It’s like they paid you to sell them something, and that’s not the kind of impression you want to leave them, especially if you want them to go back and attend more of your webinars.
Now that you know that you can monetize webinars, here are the general steps on how to host a paid webinar.
1. Choose a topic.
You’ll want a topic that’s in demand and easy to discuss in an hour. For inspiration, you can look at your popular blog posts, as well as the keywords that your readers use to find your blog.

2. Outline the content that you want to discuss.
It’s best to start by asking yourself what you want your audience to learn by the end of your webinar. Then, structure your webinar such that you have your introduction, story time, the meat in the middle, and then transition into a Q and A and goodbyes at the end.
The ideal length of a webinar is a 5- to 10-minute introduction and story time, 45 to 50 minutes for the bulk of the webinar, then a 15- to 30-minute Q and A. Keep that in mind when you create your outline and script.
3. Compose your script.
If you’re used to speaking on the fly, the outline may be enough. But if this is your first webinar or you tend to have stage fright, having a script ready will come in handy in case you lose your train of thought.
4. Design and create your presentation slides.
Take your script, arrange them into headings, subheadings, and bullet points, and place them in slides. Incorporate visual elements in your slides (images, photos, artwork) to be more engaging. Then have someone, preferably a professional, proofread your slides.
5. Include a call to action (CTA) at the end.
The last thing you want to do is to leave your audience at the webinar going, “Uh, now what?”
Have your audience do something at the end of your webinar related to what they just learned. You can invite them to click on a link that you’re going to send them, with that link leading to one of your blog posts for further reading, to subscribe to your mailing list, or to a feedback form so they can tell you what they think of your webinar.
6. Set up your payment channels.
Most webinar services allow you to set up paid webinars easily, in that you only need to indicate the fields that you’re going to ask registrants and the price of the webinar, and the service will automatically provide you a registration page and process the payment for you.
Some of them won’t have this facility available, though, in which case you need to look up how to set up your registration page and process the registrants’ payments through an ecommerce plugin right on your website. For instance, if your website is powered by WordPress, you can use plugins such as WooCommerce or Ecwid and sell a link to your webinar.
7. Do a dry run of the whole registration process and your webinar days before the actual schedule of the webinar.
You don’t want to promote your webinar, only for the registrants not to continue registering because of an error on your registration process. Test the registration process yourself, then test it again with someone else doing the registration process on a different computer, browser, operating system, and any other variable that you can test. You want to make sure that the registration process goes smoothly, barring any outside causes.
Speaking to an audience, virtual or not, is anxiety-inducing to most people. Combined with managing technical aspects such as the camera, microphone, webinar platform, live chat window, and slides, and this can be a disaster waiting to happen.

Before you go live, make sure you practice hosting your webinar with two or three friends or family members as audience members just to make sure everything goes smoothly.
8. Set up a landing page and sales page for your webinar.
Before you spread the word about your webinar, it’s advisable to have a landing page and a sales page set up where you can direct your intended participants to.
Include information about the topic of your webinar, what they can expect to learn, date and time, speakers (if it’s just you or you’re planning to have guest speakers), and a registration form.
Once they’ve registered and paid, direct them to a Thank You page to confirm their slot, the URL for the webinar (if it’s already available) for them to copy, and a quick form for them to ask a question or tell you what they expect to learn. Also, make sure they get sent a confirmation email.
9. Set up a separate email list for those who will register for your webinar.
Setting up a dedicated email list for each webinar is a practical way to make sure that everyone who paid for your webinar gets the link to your webinar, as well as additional information and updates.

Also, this list will also serve as your primary list to promote your next webinars to. If they find this webinar useful, they’re likely to be interested in your future webinars. Note that as with all mailing lists, you should make it easy for them to unsubscribe if they’re no longer interested to hear from you.
10. Write a blog post or use existing blog posts to promote your webinar.
You can create a blog post to tease your upcoming webinar. Heighten people’s excitement by asking open-ended questions on your blog post and promising to answer them in your webinar. Place CTAs and links throughout the blog post leading to the landing page.
If you’ve previously written articles covering the topic of your webinar, you can also use them to direct your readers to the landing page of your webinar. Edit your previous articles to include a CTA or a few that link to the landing page of your webinar.
When you promote the blog posts, you increase traffic to your website which increases the chances that you’re found through search. Plus, you give your readers valuable information and hype up their anticipation of the webinar.
11. Post on your social media.
If you have a decent following, it would be wise to promote your webinar’s landing page on social media as well. If engagement seems to be low, or you suspect that the algorithm is preventing your posts from displaying on your followers’ feeds, try to promote the blog posts you created for your webinar instead. Sharing an informative link could be looked on more favorably by the algorithm.
12. Let your existing subscribers know.
Who better to know and spread the word about your webinar than your existing fans/subscribers?
If they’ve been following you for a while then they should have an idea of the quality of your work and to expect the same quality in your webinar. Plus, you can ask them to share and help others that may need the information you’re covering in your webinar.
13. Test everything.
Go through an entire flow hours before your actual webinar. From logging on to the webinar software, to broadcasting, to sending a message on live chat, and all the other steps involved in getting your webinar live.

Have someone else, preferably on another computer, test the participant flow. Ask them to go through everything from clicking on the webinar link, to logging in, to sending a message or a question on live chat, to actually watching the webinar. Make sure the participants can see and hear you clearly.
14. Make sure you look your best.
No flashy clothing, no garish makeup, no green stuff between your teeth or crusties in your eyes or chocolate ice cream mustaches. In short, look closely in the mirror before going on camera. As much as possible, nothing should distract your audience from the information or skill you’re trying to teach.

In addition, you might want to plan out your wardrobe in advance so you can make sure the color looks great onscreen and doesn’t clash with your slides. Also, make sure your clothing fits perfectly and you’re completely comfortable wearing it. Even the slightest discomfort can fluster you and make you make mistakes.
15. Hold the webinar!
Make sure you’re streaming live at the appointed time. It’s actually better to be at least 5 to 10 minutes early so you can welcome participants as they log on to the webinar. Don’t forget to turn on your recording tool as well, and make sure you have enough space on your hard drive to store the resulting file.
Don’t sweat it if something goes wrong; take it in stride and do your best to power on through any technical or any other difficulties. It’s only fair to your paying audience to do the best you can to give them their money’s worth.
And don’t forget to have fun! Make your audience feel you’re having the time of your life; enthusiasm is infectious and sets them up to absorb what you’re trying to teach.
16. Send a thank-you email and a bonus to the participants after the webinar.
A thank-you email is your chance to make participants feel that you’re thinking of them even after the webinar has concluded, so it’s good practice to send one after every webinar. Include a summary of the major points that you discussed in bullet form.

Consider providing the participants with bonus learning materials, like a handout or an infographic. Offering your attendees a thank-you gift for attending the event is a great way to foster goodwill and inspire them to anticipate your next offerings.
End your thank-you email with an invitation to reply to your email and contact you if they have any additional questions, comments, or suggestions for your next webinar. You never know what kind of gems you might gather from their replies.
17. Address unanswered questions.
Because of time limitations, you might not have been able to answer all the questions asked during the webinar itself. You can either create an email to send to the website participants through your email list, or create a blog post and share that article to the participants.
18. Ask for feedback.
You can include a link to a feedback form about the webinar in the thank-you email, or you can send this out in a separate email if your thank-you email seems to be running too long. Here is a quick guide to some questions you can ask the participants:
Allow recipients to expound their answers to your questions by providing a larger text field below the questions.
19. Review and apply feedback given to you.
Feedback is useless if you don’t apply it. Read through the feedback that your audience has given you and take note of both the good and bad. Learn early on what to do and what not to do in your succeeding webinars so you can continually improve.
20. Analyze your webinar stats.
Most webinar software have a dashboard where you can see various statistics related to your webinar, such as how many of those that registered actually showed up and attended the webinar, how many of the participants logged in and then dropped out.

Other general data are usually included, such as how long the actual webinar lasted, the devices that participants used to log on, and results of any polls or surveys that you held during the webinar.
21. Think of how to repurpose your webinar.
The nice thing about webinars is they can be repurposed in various ways to help you generate more income from it. Consider creating an infographic from your slides, writing an eBook, or starting an archive of your webinars and then charging a fee to access that archive.
There’s just no way you can come up with a high-quality webinar if you don’t have the right tools for the job. Here are most of the tools you’ll absolutely need to ensure you produce a webinar that goes smoothly.
High-quality webcam and microphone
You want a webcam that has high-definition video capture, that is, a video capture rate of 720p or higher. Any lower and you’ll look grainy, especially on high-definition screens.
Ever notice that when you’re doing a video call, the screen would sometimes freeze or the image would jump around? To eliminate this effect, you need a webcam with a frame rate of 30 fps or higher.
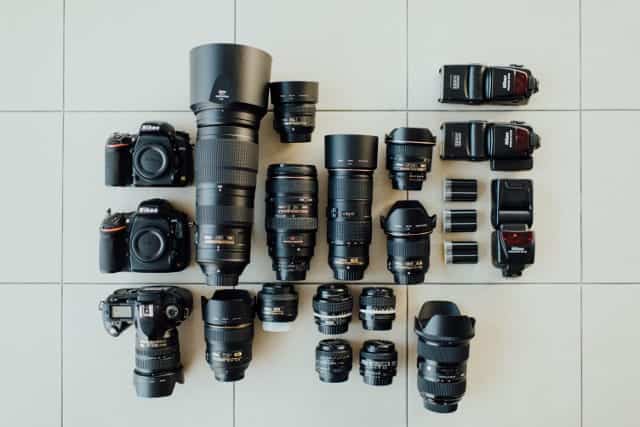
You probably don’t need this many lenses, though.
Your microphone, on the other hand, needs to produce a professional sound by blocking background noise, preventing popping sounds when you pronounce P’s in words, and allowing you to smoothen out the volume level and the frequency of your voice.
Lighting setup
The best light is natural light, but if that’s difficult to achieve, an inexpensive ring light can do the job if you’re just stationary.
Extra monitor/computer
When you’re doing your webinar, the amount of information on a single monitor can be overwhelming: your software, your slides, your script, and of course you want to see what your audience is seeing.
The thing is, you want to be able to see what your audience is doing and typing to the live chat or message board, too. You want to know if they’re having technical difficulties and if it’s an isolated case or if the problem is on the webinar platform or on your side (yikes).
Using two monitors side-by-side allows you to see and handle all of these issues as they come without missing anything.
Having an extra computer is even better, in case your go-to computer freezes in the middle of a webinar (they can smell fear).

Digital clock and timer
You’re operating under a time limit, which you don’t want to go over by much. The problem is you can’t always see the computer clock when you’re in presentation mode, and if you’re not yet used to giving webinars, it’s easy to lose track of time.
In a rare exception, this piece of equipment doesn’t have to be too high-end or too fancy. Even a kitchen timer with a large enough display will do.
Slide presentation software
Your slides need to look professional and attractive, and here are the major applications you can use.
Webinar platform
Free webinar platforms (e.g., Google Hangouts, Facebook Live, or YouTube Live) are often used for free webinars, but for paid webinars, you need to invest in paid platforms.
The webinar platform you use for paid webinars should be reliable (works every time), scalable (can go from less than a hundred attendees up to a thousand or more without compromising quality), easy to use (doesn’t require much of you in terms of learning how to work the software), and cost-effective (gives you value for money).
Here are some webinar platforms worth checking out.
Video recording software
Paid webinar platforms usually have built-in video recording capabilities, but in case the platform you chose doesn’t have them, here are a few recording applications you can try.
Video editing software
As with video recording capabilities, paid webinar platforms usually include basic video editing functions, but if you need more detailed editing, here are a couple of video editing software you can use.
Video hosting
When you make recorded webinars available to those who paid but weren’t able to attend, you need to house them somewhere. You can, of course, host them on your website, but that would cost you every time someone streams the video from your website.
A more practical solution is to host them on a website specializing in video hosting, like one of the sites below. Take care not to just give away the link to anyone; it’s up to you to make sure that your webinar is exclusive to those who paid for it.
Hosting a paid webinar is one of the ways to monetize your blog that gives you a high ROI in terms of time and effort investment compared to potential income and repurposing the original webinar into another.
Here’s a recap of the main steps I discussed above.
Phase 1: Preparation.
Phase 2: Promotion
Phase 3: D-Day
Phase 4: Post-Webinar
Have you hosted a free webinar? Are you interested in hosting paid webinars? Did this article help you decide? Share your thoughts in the comments!
JoAnne is your average, everyday, sane stay-at-home mom who believes in the power of the internet to make dreams come true. She has an insatiable appetite for chocolate, as well as all things internet marketing. She keeps up with the latest trends in blogging, affiliate marketing, e-commerce, and more.
