(3) comments
Add Your Reply

If you want to be a serious blogger, you’ll have to take blogging seriously. And to be a serious blogger, you need to work efficiently and logically. In today’s article, I’ll run through ways on how to organize your blog.
If you’ve been blogging for a while, you should know by now that plenty of tasks go into running a blog.
And if you haven’t, then consider this your fair warning.
The problem is rarely in doing those tasks per se; it’s in doing these tasks effectively so that your blog runs smoothly and you don’t collapse from anxiety from the mental burden of not being organized.
In today’s article, we’ll go through how to organize your blog: from preparing your blog before you even write your first article, to classifying your blog posts so they’re easier to find.
Have you ever been so busy and yet so confused that you were barely able to function and complete your deliverables? Or felt that there just isn’t enough time in a day to do everything you’re supposed to? Or missed crucial deadlines that had dire consequences for you or your blog?

Take that as a sign that you need to be better organized. Here are the benefits of organizing your blog.
Being organized reduces mental overload.
Blogging isn’t only about writing blog posts. It involves various tasks like social media marketing, writing email newsletters, and website maintenance. Having a system in place allows you to handle numerous tasks without being too overwhelmed.
Being organized saves you time.
No more time lost frantically looking for missing files, or doing what turns out to be a low-priority task and then having to make up lost time on your other high-priority activities. If you’re organized, you know where to find everything you need, and you’re able to do high-priority tasks first before low-priority ones, saving you time and making you more productive.
Being organized lowers your stress levels.
Lower mental overload plus better time management equals being able to meet deadlines and expectations successfully, which makes you a happier, less stressed worker. Plus, the time you save from being organized frees some time for non-work activities, which allows you to achieve work-life balance.
Being organized gives you focus.
The beauty of organizing your tasks is that it allows you to prioritize your targets and tasks such that you can make better decisions about what to do first so you can reach your mini-targets as well as your bigger targets.
Being organized increases your creativity.
Freeing up your mental resources gives you more room to think up new topics, alternative ways to work, and innovative solutions to obstacles and difficulties.
Hopefully, you’re now convinced that organizing your blog benefits you and your blog. Let’s break down how to organize your blog by looking at 4 different aspects of your blogging journey.
If you already have your blog, then it might be too late for this, but you never know; you might find a couple of action points here that you can still implement. Here are some things you’ll wish you did before you started your blog.
Having your social media accounts up and running early on will give you a head start when promoting your new blog when it launches. It also gives you an early research tool for pressing topics in your niche.
Most email service providers do allow starting an email list even if you don’t have a website. It’s not recommended to have only a mailing list, but having it before you set up your blog can be better than setting it up afterward.
You won’t believe how many logins and passwords you will collect during your blogging journey. Password managers such as LastPass or 1Password.

A Gravatar is a profile image that appears every time you post on your blog. It also appears whenever you comment or post on another blog or on a forum. It seems like such a minor detail, but setting up a Gravatar and having a single photo across the internet that identifies you and your blog is a great way to establish your brand at the outset.
You’ll need your Google account to access productivity tools such as Google Calendar, Google Drive, and Google Docs.
You’ll also use your Google account for plenty of blog-related activities, such as YouTube (for when you want to create video content), Google Ads (for when you want to use ads to promote your blog), Google AdWords Keyword Planner (for keyword research), and Google Analytics (for information about your website visitors).
Other tools such as Google Trends (for keyword and topic research) and Google Webmaster Tools (for more information about your website that’s not available through Google Analytics) can also be useful.
It does take time to build up and develop a blog such that you’re ready to monetize it. But it’s just smart to be prepared for anything, even success.
Open a separate business bank account for your blog so you can keep your personal finances separate from your business finances and make doing your taxes less complicated. Plus, creating a spreadsheet to track your expenses and incomes can help you be organized.
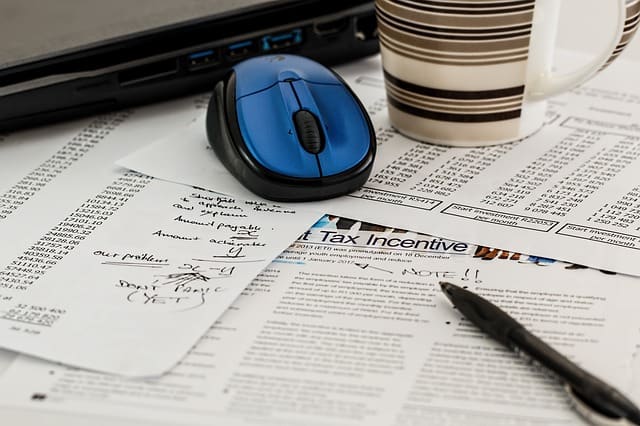
You can also look at tools such as QuickBooks Self-Employed or FreshBooks to help you organize your cash flow.
Imagine sitting down to your desk to work on your blog. You open your laptop, ready to work.
And then your power plug is nowhere to be found, because it’s lost somewhere here:
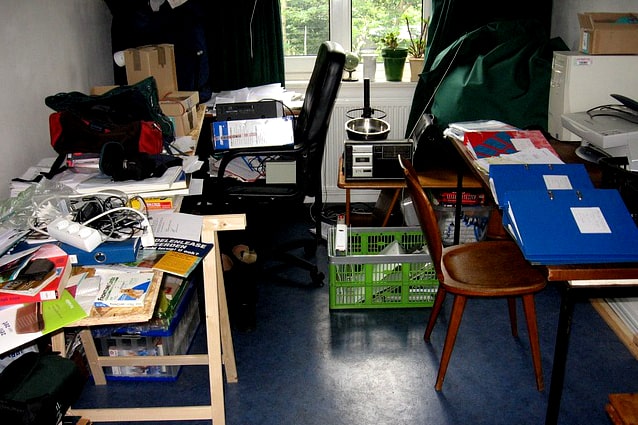
If your workplace looks like this, it’s high time to put it in order. And the same goes for your digital workspace too.
Here are some ways to organize your blogging process.
Well-organized files save you plenty of time and distress. Having unlabeled files strewn all over your workspace as well as your computer can drain precious hours from your workday. This is especially frustrating when you urgently need a specific file and you can’t find it anywhere. Here are some pointers on how to organize your files, both paper and digital.
Paper files. The best way to organize paper files is to get rid of them if possible. Subscribe to paperless bank statements and bills, and pay your bills online when you can. It’s easier to implement a system for digital files than it is for physical ones.
But of course, there are paper files that are necessary from a business standpoint, such as certain invoices, bills, and receipts that don’t have an option to be converted digitally.
You’ll need to set up a filing system, such as an accordion folder or a hanging file cabinet. Whichever system you implement, ensure that it’s logically organized, easily accessible, and readily expandable to store additional documents over time.
Invest in a high-quality paper shredder that preferably can also shred credit and ID cards and thicker stacks of paper. This may sound strange, but part of a good filing system is a secure disposal system. Anything printed that contains your personal information needs to be shredded thoroughly to prevent identity theft.
Digital files. Working on a blog produces so many files; maybe more than you ever expected. Organizing these files may seem like a daunting task, but it doesn’t have to be.
The first thing you need to have is ample storage for these files, preferably in a solid state drive. It’s good sense to keep a copy of these files in a cloud storage facility, but remember that the internet is constantly changing; not everything on it lasts forever. Businesses fold, websites shut down, and your files can completely disappear.

Another thing you have to plan is your file hierarchy. The ideal structure is one master folder for everything related to your blog, then subfolders for each year, and then each month, then one folder for each of the blog posts you created that month.
Each blog post folder should contain everything you used to create that post. This can include the images you used, a text document version of your post, and your research files. If the blog post was sponsored, store a copy of the written agreement or contract you signed, as well as a copy of the invoice and receipt or any proof of payment.
Most operating systems, by default, display folders and subfolders sorted by their names alphabetically. But it makes more sense for you to display them chronologically. To have the folders make sense both ways, you’ll have to label them a certain way:
As you can see, the labels on the folders are arranged chronologically and alphabetically. It’s especially critical to use numerals to represent the months because months arranged alphabetically (i.e., April, August, December, February, etc.) are not arranged chronologically (i.e., January, February, March, April).
Plus, it’s important to place a date in front of folder names for your blog posts so that even your blog posts are arranged chronologically, regardless of their titles. Its up to you whether to make that the date you created (or started to create) your post or the date that it was published in your blog.
Aside from your blog posts, create subfolders as well for all the other content you create and publish: email newsletters, lead magnets, video content, audio content, eBooks, and all other types of content. Make sure to follow the same hierarchy above so everything is chronological, and that each subfolder for each piece of content includes everything you used to create that piece of content.
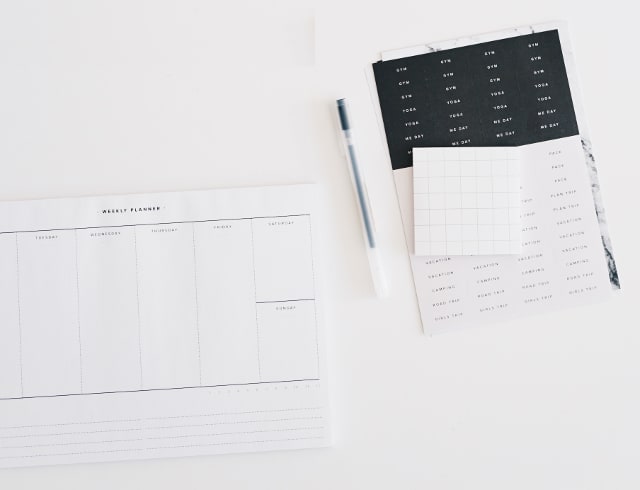
Creating a blogging calendar gives you an overview of what you need to accomplish without having to go through your files to figure out which tasks need to be done on which day. A blogging calendar also allows you to keep your schedules in one place.
Also, having a blogging calendar makes it easier to plan out a daily and weekly routine. Getting into a routine and actually following it can help you do your tasks efficiently. Plus, having a routine makes it easier to schedule tasks for the future.
Google Calendar is a tool allows you to create multiple calendars for the different types of blogging tasks that you need to schedule, such as blog posts, social media updates, email newsletters and updates, blog maintenance jobs, etc.
You can also use other calendar apps such as the built-in Apple Calendar app for macOS and iOS, but Google Calendar has plenty of integrations available, especially for other Google software.
I’ve previously written about how to create a blog post calendar specifically, but you can apply the basics of calendar management to all of your other tasks.
Having a checklist of the things that you need to do to accomplish a certain multi-step process (e.g., writing a blog post, putting out an email newsletter, or implementing a social media campaign) helps you not miss a step and execute that process smoothly.
Different people have different ways of listing their tasks, but just make sure all the necessary tasks are included in that list. Plus, make sure that your checklists are where you can easily access them. Depending on whether you’re more comfortable with digital or paper lists, you can either post it on your computer desktop or print it and pin it where you’re working.
The point of being organized is to free up time and resources so you can do more. Automating processes that can be automated does exactly that. Remember, of course, that not all of your blogging processes can be automated.
There are various scheduling tools you can use for social media promotion, such as CoSchedule, Buffer, and Tailwind. You can compose the social media status in advance and then schedule it to come out.
Other tools you can use include tools designed to integrate different software, such as Zapier or IFTTT.
Jumping right into an article shouldn’t be an option for your blog posts. When your writing process is haphazard, it shows in the resulting article. No matter how good or well-researched your writing is, it’ll never make an impact if it isn’t organized. You’ll want to have a systematic approach to your writing so that your blog posts are easy to understand.
If your writing doesn’t have structure and a logical flow, your readers will have to struggle to grasp your article and they’ll probably end up giving up on your article entirely.

“Huh?”
Here are some ways to organize your writing process.
Writing down all your blog post ideas in one place ensures that you know where to jot them down when you get inspired, and you know where to look when it’s time to write a blog post. Thus, it’s best to carry a single journal or notebook to write down your ideas.
On the other hand, if you’re more of a digital note-taker, you can download tools such as Microsoft OneNote, Evernote, or Google Keep on your laptop and your smartphone so you can take notes anywhere you get inspired and still keep them organized. All three tools I mentioned have search functions and are able to sync your notes across your devices, which are convenient for your purposes.
Whichever method or tool you use to take note of your ideas, bear in mind that for this to work, you need to stop writing random ideas on random pieces of paper scattered around random places. You have to develop the habit of jotting down ideas only in your chosen place. Carry your idea notebook wherever you go.
When you do your research online, it pays to compile all your research files into a single document or text file so you can easily access everything later on when you’re ready to write. Make sure to keep it in the appropriate blog post folder I described in the previous section.
Also, since you’re going to be doing plenty of research on other websites, look into using tools such as Instapaper or Pocket for storing websites you’ve viewed for your research so you can look at them even when you’re offline.
For files that are larger than simple websites, like eBooks or industry reports you don’t plan to keep for very long, you can store them in cloud storage facilities like Google Drive or Dropbox so they don’t take up precious space on your hard drive and you can easily delete them.
Everyone who ever studied English probably learned how to make an outline every time they write an article, but since making one can be tedious, you may be tempted to skip it and just go straight to writing.
Bad idea.

An outline helps you set the direction for your article even before you start actually researching and writing it. Listing down all the points you want to discuss in your article helps you see the bigger picture and stay on track while you’re writing.
When you create your outline, you have to consider how to arrange your post. Depending on the topic, you can arrange your post chronologically, in order of importance, compare and contrast, problem + solution, or a numbered list.
Having a certain structure for your blog post makes it look visually appealing and entices readers to read what you’ve written. Plus, breaking your content down in pieces convinces them that they can easily digest your content, making them more likely to dig in.
A long-form blog post would usually have an introduction, body text, and a conclusion. When you split your body text into sections that are easier to digest, label these sections with section headers that are descriptive and include relevant keywords to help with your on-page SEO.
Because section headers are the pieces of text that your readers will skim through first before reading each section, make sure to compose section headers that stand out from the body text and are enticing to read to keep them moving throughout your article.
When you enter a bookstore, you’ll notice that the books are grouped into different genres or categories, such as science fiction, religion, biographies, travel, and self-help.
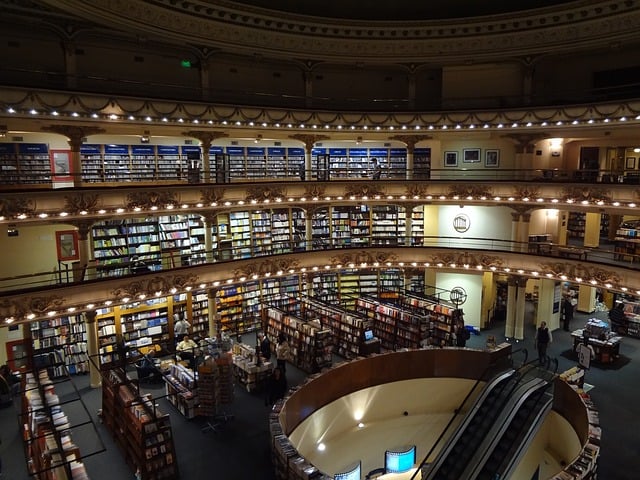
There are other ways to arrange books: by title, by author, or by year of publication. However, grouping books by their genres makes sense because customers ideally care more about the content than they do about the author, for example. Plus, it entices customers to browse through the shelves so they can find books about the topics they actually want to read about.
Once customers are in the section they were interested in, they’ll usually find that the books are grouped more specifically. For example, cookbooks can be subcategorized into different cuisines as well as different dietary requirements, such as gluten-free, dairy-free, or keto cookbooks.
Similarly, your blog posts should be grouped into categories that describe the general topic that they have, as well as 3 to 10 tags that describe more specific topics discussed in the article. As with bookstores, you’re doing this to make it easier for your readers to find posts they’re interested in.
Here are some ways to properly use categories and tags to organize your blog posts.
As I’ve briefly mentioned above, the point of using categories and tags is to help your readers navigate your blog easily and find blog posts that are interesting to them so they’ll stick around for a while.
The reason why I’m reiterating this is that some bloggers use too many categories and tags in hopes that it will boost off-page SEO. Categories and tags tell search engines what your blog post is all about and which of your blog posts are related, which does help SEO to an extent.
However, using too many categories and tags because the more tags you use increases the probability that these tags are irrelevant to the actual content of your blog posts, and thus can be seen by search engines as keyword stuffing, which can actually harm your SEO. This is why having just the right number of categories and tags is important.
While there aren’t any hard-and-fast rules for how many categories and tags you’re allowed to have, here are some pointers to help you determine the ideal numbers for your blog.
Maximum of 20 categories. The actual value may vary per niche, but having more than 20 categories in your blog could mean that the categories you’re using are too specific. In this case, do your best to merge categories so that they cover a wider range of topics.
On the other hand, if you have only 1 or 2 categories, your categories may be too broad. See if you can break down the categories into more precise ones.
Exactly 1 category per blog post. If you’re doing it right, then each of your blog posts has 1 general topic and should, therefore, belong to at least 1 category. In fact, WordPress technically allows you to assign more than 1 category to a blog post. But why is it a good idea to assign exactly 1 category to a blog post?
Going back to the bookstore analogy earlier, having a book title under different sections of the bookstore will be confusing and impractical to both the customers and the bookstore employees. A book should only belong to a single section of the bookstore.
If you find yourself constantly having a hard time choosing between two categories when you publish a blog post, you might have to rethink your categories.
At least 1 blog post under each category. The way categories work in WordPress is that for every category you create, it creates a page for that category and displays all the blog posts under that category. The thing is, WordPress does this for all categories, whether you assign it to a blog post or not.
Don’t create a category in your content management system if you’re not going to use it. You don’t want your users to stumble upon a link to a category page, click on it, and get an empty page. It just doesn’t make a good impression.
Keep it to 3 to 5 tags per blog post. As I’ve mentioned earlier, tags are more specific identifiers of your content, so you’d expect more tags than categories for one blog post.
On an average blog post of 1,000 to 1,500 words, you’ll probably only need 3 to 5 tags. For longer blog posts, you can exceed that range but bear in mind that they all have to be topics completely relevant to the blog post.
Aside from the number, you’ll need to optimize the actual words and phrases you use in your categories and tags to ensure that they’re high-quality.
Bear in mind that depending on the theme of your blog, categories and tags are likely to be displayed on your homepage. Make sure the words and phrases you use are professional, spelled correctly, and in the correct case. For example, you don’t want to use “seo” as a category or tag; you’ll want to use “SEO.”
In addition, you’ll want your categories and tags to be as succinct as they can. It’s tempting to be clever here and try to be witty, but this is not the place to do it. Don’t use “How To Sell Products” when “Sales” will work just as well.
Also, your categories need to be understood at a glance; that is when your readers see them, the type of posts that they can expect should be apparent.
WordPress displays all the categories you have on the right-hand side of the page where you compose and edit your blog posts, so you can easily see them and assess whether they’re still relevant and up to date.
Tags, however, aren’t listed, so you can’t see an overview of the tags you’ve already used. What you can do instead is keep a record of all the tags you’ve ever used in your blog. This way, you can manage your tags easily; see which ones need to be updated or even removed, which ones can be merged in a single tag, and which ones can be improved.
Having an organized blog reduces stress, saves you time, increases your creativity, and makes you a better blogger in general. Here’s a recap of the organization tips we discussed today.
Organize Your Blog Before You Even Start
Organize Your Blogging Processes
Organize Your Writing Process
Organize Your Blog Posts
Hopefully, you’re better equipped to organize your blog.
Were these organization tips helpful? Do you have your own organization techniques for your blog that you’d like to share? Hit me up in the comments!
JoAnne is your average, everyday, sane stay-at-home mom who believes in the power of the internet to make dreams come true. She has an insatiable appetite for chocolate, as well as all things internet marketing. She keeps up with the latest trends in blogging, affiliate marketing, e-commerce, and more.
