Menu

One of the biggest struggles in your blogging is publishing consistently. In this blog post, I’ll show you how to create a blog post calendar so you can schedule your content, as well as your promotion efforts for your social media followers.
Content is your blog’s lifeblood.
Routinely publishing content is key to having your blog found and indexed by search engines and having a steady stream of shareable articles for your readers.
But producing content can be lost in the shuffle of “to-dos” and “must-dos” and “must-do-nows” that blogging involves.
To make sure that your blog’s superstar isn’t relegated to the background, you need to consciously incorporate it in your schedule, and not just leave it for when you feel like it.
In this blog post, I show you how to create a blog post calendar where you can schedule when to publish your blog posts and when to promote them to your followers.
To you naturally organized bloggers out there, “why make a calendar?” seems like a no-brainer question.
For the rest of us, here’s why you need to create one today.
Raise your hand if you’ve written down ideas for blog posts on sticky notes, your day planner, that little notebook you have in your purse, backs of receipts, your smartphone’s note apps, etc.

And then you try to pin it all on your pin board like this.
Having one central repository of your brilliant brain dumps ensures you don’t lose these ideas before you get the chance to flesh them out.
Seeing a bird’s eye view of your tasks beats having to rifle through plenty of papers and even virtual lists just to figure out what blog post needs to get done by what day.
Plus, having everything available in one glance helps you identify both strong and weak points in your content repertoire.
For example, maybe you’ve scheduled three consecutive “best-of” posts. This is easier to spot and fix (maybe insert a “how-to” or listicle post in between) when you have a calendar.
Conversely, when you have just the right mix of content, it’s easier to take note and model the next month’s content selection.
Writing (or typing) down your goals makes you more likely to follow through with them, as opposed to just keeping them in your head and hoping you can remember them.
Carving out time to write your blog posts in advance and assigning deadlines to your blog posts seem like simple, mundane tasks to you, but they actually work wonders on your mind.
Documenting them also compels you to focus on the urgent task ahead instead of being blindsided with necessary but unrelated tasks. This makes your workflow go so much smoother because you’re able to focus on one task at a time instead of trying to tackle the tasks as they come.
For example, it takes out the distraction of having to think of your next blog post idea when you should be focused on the promotion of your latest one. It’s necessary, but promotion is time-sensitive while brainstorming for the next blog post isn’t.
When you have all your blog posts in one spread in your calendar, it’s easier for you to correlate your tracked data with the posts that you’ve published, which helps you find out which posts work for your audience.
For example, you might publish an article about a certain topic in Week 1 and again in Week 2. You look at your data and notice that engagement is way below the usual. It’s probably wise to steer away from that topic in the future, or if you still insist, maybe change up the blog post format into a shorter or punchier one.
This works similarly for your promotion strategies. If you’ve been tweeting every Monday and no one’s clicking the links and no one’s retweeting, try to experiment with the day of the week as well as the time of day.
When you have all the information on your calendar, it’s easier to keep track of your experiments and come to a correct conclusion about which is the optimal day to send out your digests.
You’ll get your content mix and promotion schedule down pat in less time than if you have no calendar to work with.
Now that you know WHY, here’s HOW to make a blog post calendar.
The spreadsheet application I’ll be using is Google Sheets, but it can actually be any spreadsheet application you’re comfortable with: Microsoft Excel, OpenOffice, or any other spreadsheet application.
I prefer Google Sheets because it’s accessible through channels that I normally use: my smartphone (there’s an app) and my laptop through my web browser. I can even set up a sheet so that I’m able to work offline and it can sync once an internet connection is available. Google Sheets also allows plenty of integrations with other applications, as we’ll see later.
Plus, it’s free to use.
Granted, it’s strange to use a spreadsheet as a calendar, but you’ll soon find out why using spreadsheets is the easiest way to do this.
Note: As mentioned, I’ll be using Google Sheets for this blog post calendar, so the following steps are specific to Google Sheets.
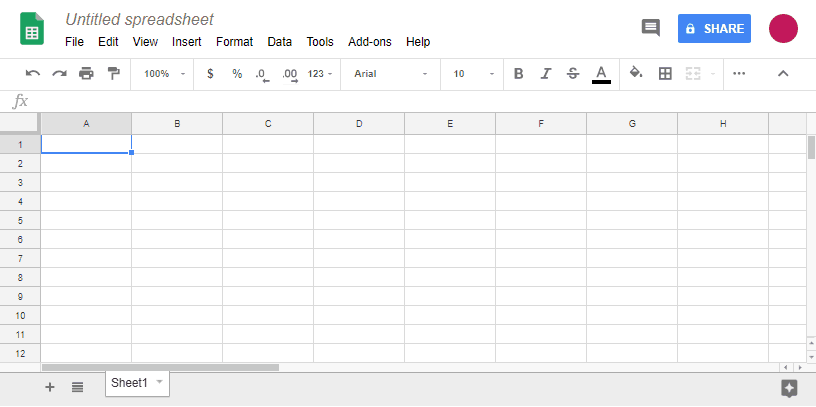
First, you need to have a Google account if you don’t already have one, and then you need to go to Google Sheets and create a new spreadsheet.
Click To Zoom
Next, create these basic columns:
These are the essential pieces of information that you want to take note for every blog post that you create. Now, whether you’re consciously brainstorming blog post ideas or got inspiration from somewhere, you can open this spreadsheet, jot it down under blog post idea, and it’s saved automatically.
Blog post idea. Note that I placed this as the first column. I prefer it this way so that the first column I see is the blog post idea column. That way I don’t have to look for the right column and risk forgetting that idea. All the other columns can be blank for now and I can flesh out the ideas later.
BUT, if this is not your style at all, feel free to move it around as you wish.
Target keyword. If you’re doing keyword research first before narrowing down your idea, you may find yourself filling out this column first before the blog post idea, and that’s okay.
Blog post type. You want a content mix that works for your blog. If you’re still trying to find the ideal content mix, experiment with a variety of blog post types that you feel may resonate with your readers.
Some blog post types you might want to experiment with include:
Taking note of this before you even write the post allows you to see which blog post types work for your audience and which ones don’t. Once you have an idea of which types they prefer, you can narrow your focus and concentrate on the actual content instead of the format or type.
Possible headline. As with the other columns, you might come up with this one first; again, that’s okay. When you’ve finalized the headline, you can indicate it by changing the font to boldface or changing the font color.
Target publish date and time. This is the deadline for your finished, edited, proofread, finalized blog post. Allow yourself enough time to do your blog posts.
The dates may be out of order as you decide on different deadlines for your blog posts, but you can always order the rows by date so you can see everything in chronological order.
Take note that these columns are just basic ones to get you started on the habit of logging your ideas. You can add to them if you feel you need to add more information.
You don’t need to create a new spreadsheet for your social media postings. Creating a new worksheet in your existing spreadsheet should work fine.

Note the 2 worksheets “Blog posts” and “Social media” encircled in red. (Click To Zoom)
Next, create the following columns:
Blog post title and URL. Of course, if you’re promoting your blog post, you should never forget to include the link to it.
Tip: You can shorten the link through Bitly, which also gives you tracking information about the link, such as how many clicks it got and where in the world the clicks came from. It’s free to use for basic link shortening functions.
Social media platform. Indicate which social media platform you want to share your post to.
Draft of update/tweet/caption. You can compose a draft of what you want to say to your followers to get them to read and share your blog post in advance.
Target post date and time. This is when exactly your social media post should be posted. Again, allow yourself plenty of time to be able to promote your blog post.
You can stop here and start using your spreadsheet.
Or you can take your blog post calendar further.
Yes, it’s tedious, but seeing a calendar view of your blog posts should be well worth the effort.
I chose Google Calendar because it’s as accessible (and as FREE!) as Google Sheets.
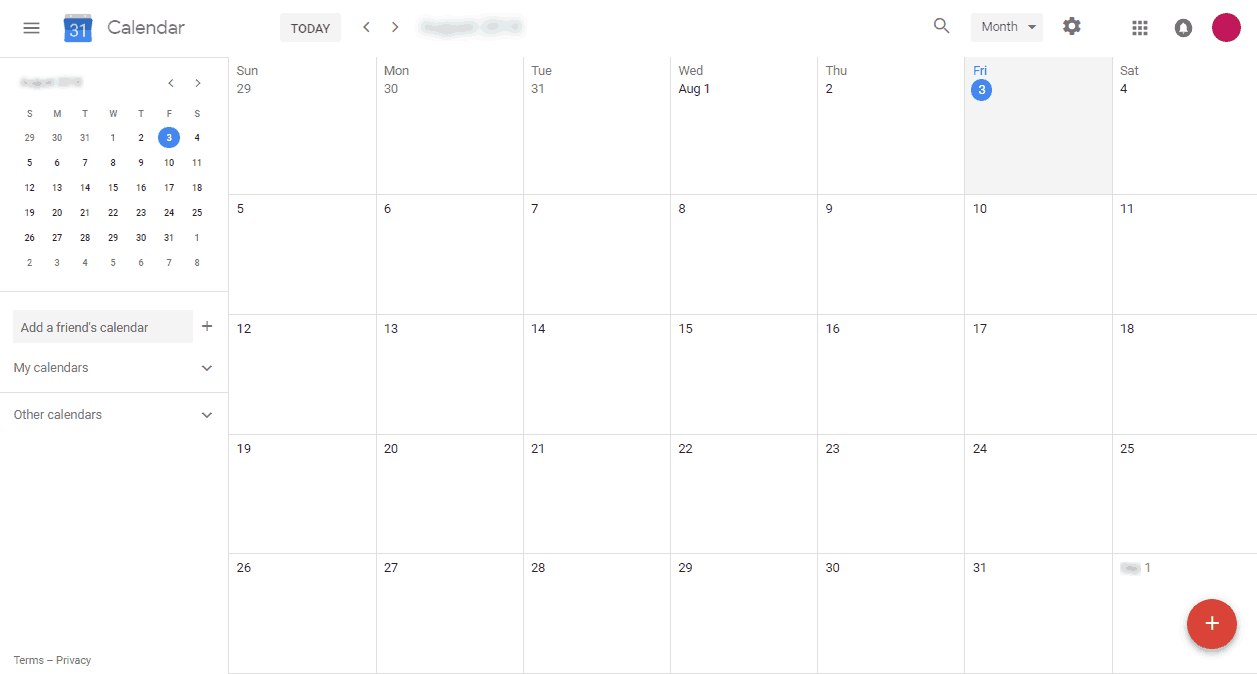
Click To Zoom
To add an event, click the (+) icon at the bottom right corner of the page.
You only have to copy over data from two columns: Blog post idea and Target publish date and time. You just have to plot it on your calendar so you can see it.
You can also set up reminders for upcoming deadlines to be sent to your email as well as your smartphone if you have the Google Calendar app.
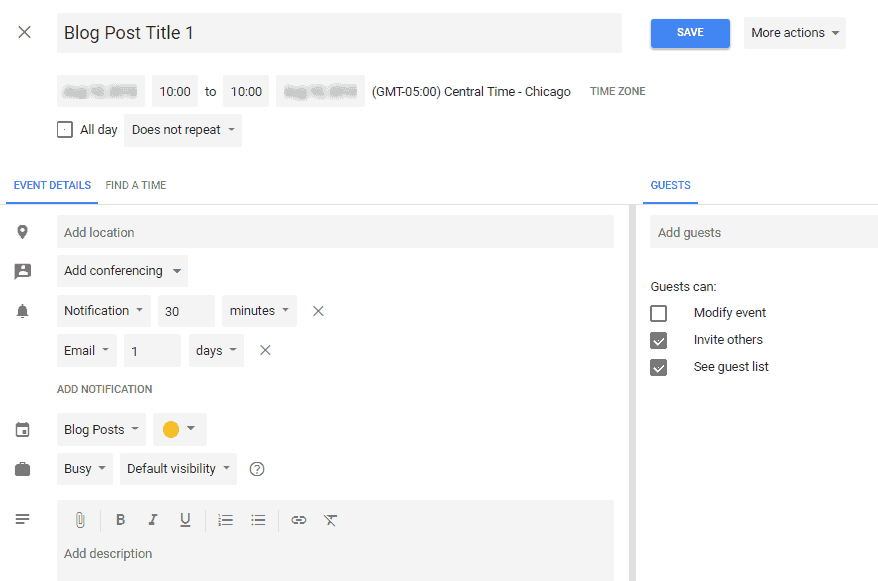
Note that you can add both a notification and an email to remind you of this deadline for your blog post. (Click To Zoom)
Using Google Calendar also allows you to Input your writing schedule so you have an idea of whether you can make the deadline you’re giving yourself.
Another great feature of Google Calendar is you can create multiple calendars, which means you can separate out the blog posts from the social media updates and you can see them together or separately, as needed.
Plus, if you’re already using Google Calendar as a personal schedule keeper, you can also toggle viewing it so you know if your writing schedule and deadline will be affected by upcoming events or vacation. (Pro tip: Always take the vacation. The blog will still be there when you get back. It can wait.)
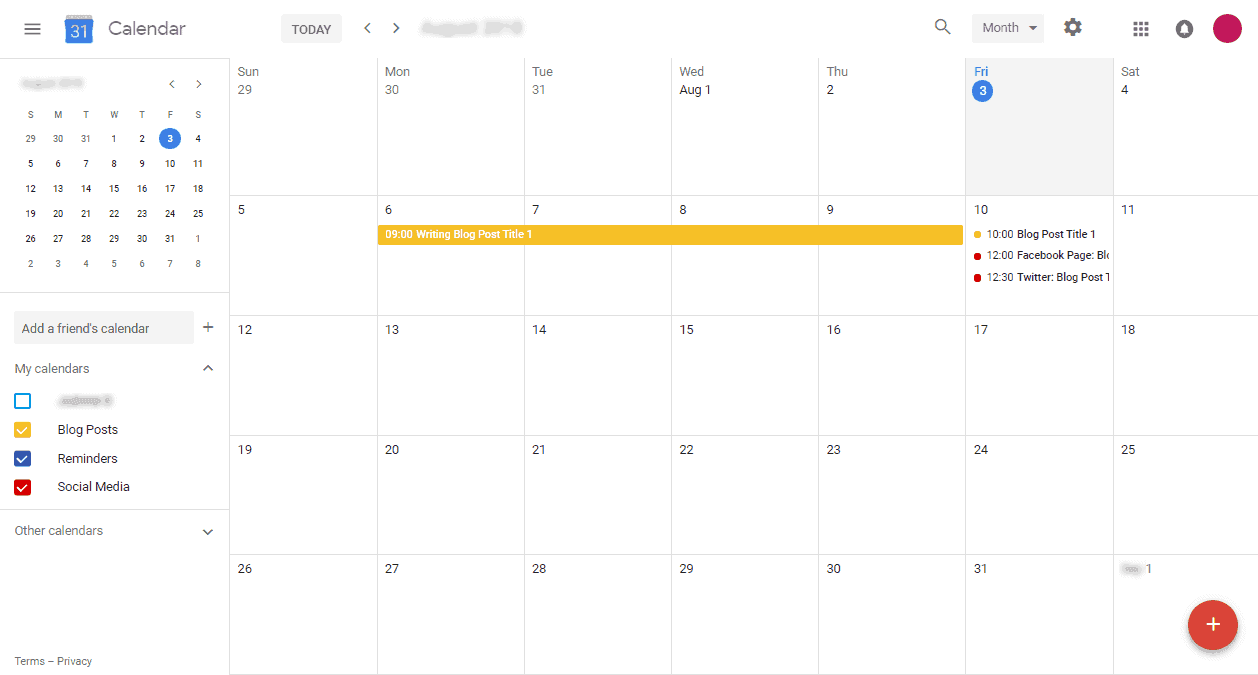
Note the separate calendars for Blog Posts and Social Media. Note the writing schedule for the entire week before the blog post is set to be published. Note as well the Facebook page and Twitter tweet are added as well. (Click To Zoom)
For a more advanced approach, you can integrate it with Google Sheets so that every time you add a row in your Google Sheets, it automatically creates an entry in your Google Calendar. Before you balk at the technical knowledge required, you can use a tool called Zapier to set this up.
I won’t be covering that here because that’s out of scope, but this is something to keep in mind in case you want a more automated system.
Once you start having an email list and an email newsletter, you can create a separate worksheet on Google Sheets for scheduling your email newsletters notifying your subscribers of your latest blog post.
Here are my suggested columns:
I say “suggested” because the columns largely depend on what type of newsletter you plan to come up with and how often you intend to put out your newsletter.

Draft of subject line. The subject line of your email newsletter is the first thing your subscribers will read and is crucial in their decision to open and read your newsletter, so it’s important to get this right. Drafting your subject line early will help you refine it so it’s compelling enough for your subscribers.
When you’ve set up this spreadsheet, you can also create a new calendar on Google Calendar for scheduling your newsletter.
When you’ve been using this Google Sheets + Google Calendar combo for a while, you can again take it further with automations. Again, Zapier will be your friend here, but an alternative site is IFTTT.
You can Integrate your blog post worksheet with WordPress such that a new post is created every time you add a new row to that worksheet. Also, you can integrate the same worksheet with your preferred note-taking or word processor app so that it creates a new page or a new file when you add a new row.
Your social media worksheet can be integrated with your Twitter, Facebook page, or other social media accounts so that a draft tweet or post is created when you add a new row and the social media account is indicated in the appropriate column.
Lastly, your email newsletter worksheet can be integrated with a number of email service providers so a draft email gets composed whenever you add a new row in the worksheet.
If you’re already earning an income with your blog, and you want to go into automation, but don’t have the time to study how to go about doing it, you can always go the premium, paid route.
Creating a calendar (or calendars) using paid tools still has a learning curve, and you’ll still have to study them, but when you’ve been blogging for a while and especially when you’re already monetizing your blog, the more processes you can automate, the more time you’ll free up for activities that actually earn you money, like selling your own products or promoting your affiliate links.
Some of the more popular paid tools include Buffer, CoSchedule, and Hootsuite for social media scheduling.
Scheduling your blog posts in a blog post calendar is a great way to organize your content and make sure that you’re publishing content on a regular basis.
It can be as simple as a single spreadsheet, and as complicated as an integrated spreadsheet connected to different applications to automate your process. Whatever the format or degree of complexity, a blog post calendar is a necessity.
Before you go on your organizing spree, here are just a few more reminders.
At least one study has shown that it takes 66 days of repetition on average for something to become a habit (you can read the whole study here if scientific papers are your thing). The exact number of days depends on how simple or complicated the desired behavior is.
Start with simply opening or laying out the calendar in front of you before you even start working on anything related to your blog. Before you know it, you’ll get used to opening it and even writing in it every day.
Scheduling tasks in a calendar serves as a visual reminder of these tasks, as well as their order and importance.
But jotting down these tasks in that calendar isn’t the same as actually doing them.
When you give yourself a writing schedule to meet a deadline, make sure you follow through. Otherwise, you’ll find yourself scrambling and changing dates and deadlines, which is the opposite of how a schedule works.
If you find yourself constantly unable to meet your deadlines (with the possible exception of the rare emergency situation or crisis), you might not be giving yourself enough time to accomplish them. Reassess your writing speed and how well you write on a certain time of day so you’re setting deadlines that are feasible.
How do you organize your blog posts? Are you using a blog post calendar or any sort of planner to schedule your posts? I’d love to know your methods, so please share them in the comments!
JoAnne is your average, everyday, sane stay-at-home mom who believes in the power of the internet to make dreams come true. She has an insatiable appetite for chocolate, as well as all things internet marketing. She keeps up with the latest trends in blogging, affiliate marketing, e-commerce, and more.
